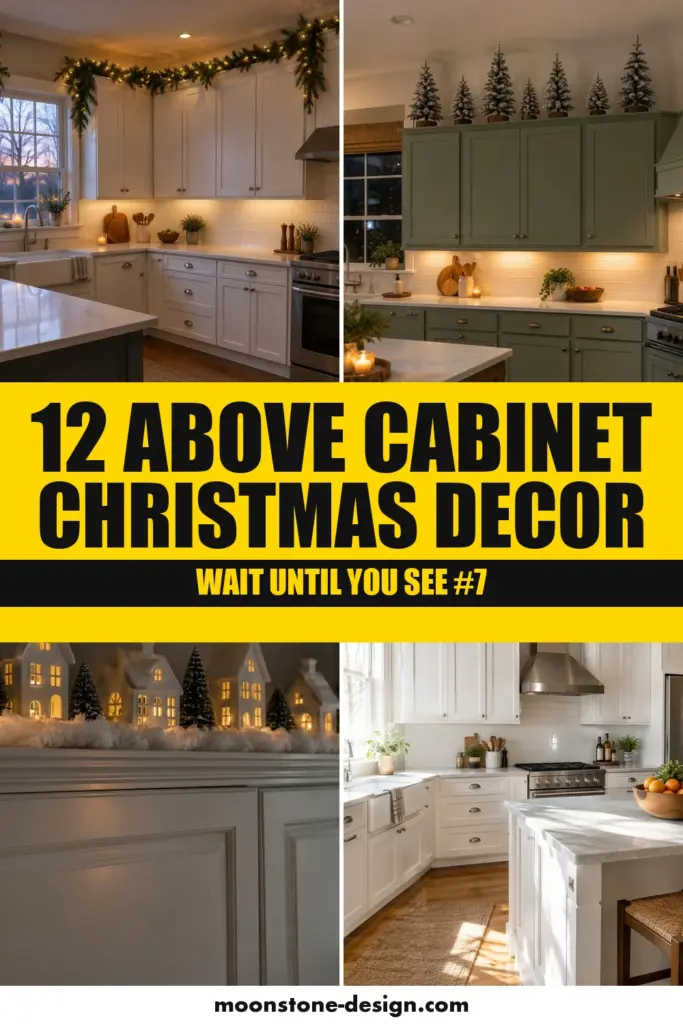
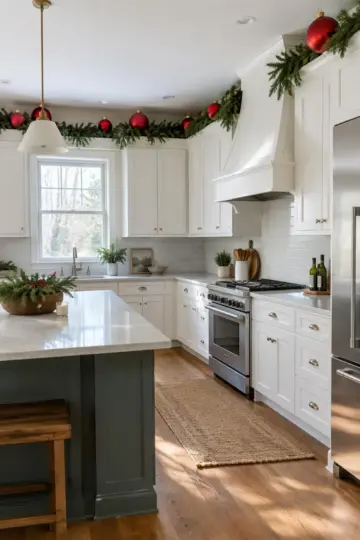
You hang the last stocking, step back into the kitchen, and look up. Above the cabinets sits a foot of empty space, a dusty basket, and one fake fern from last spring. The rest of the house says Christmas, and that gap says nothing.
Above kitchen cabinet Christmas decor fixes the blank spot without touching a single counter. These 12 ideas are sized to be seen from the floor and light enough to carry up a ladder. Grab a steady step ladder and a helper before you start.
Short on time? For the fastest results, try ideas 4, 8, and 12, which need no cords and no tools. Images are AI-generated illustrations.
Lit Garland Along the Full Run
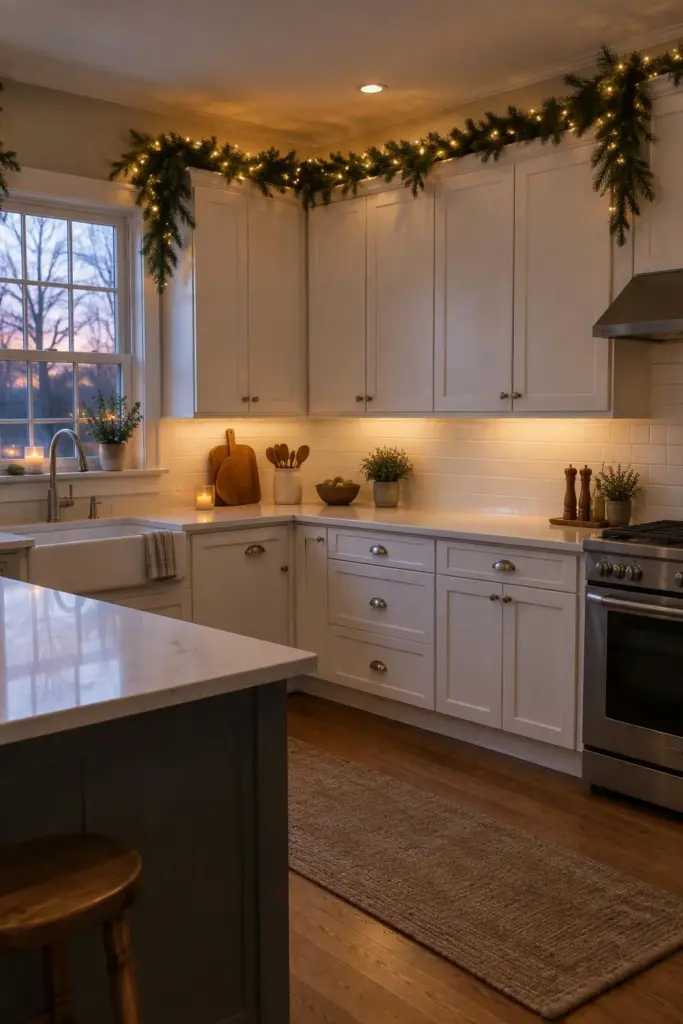
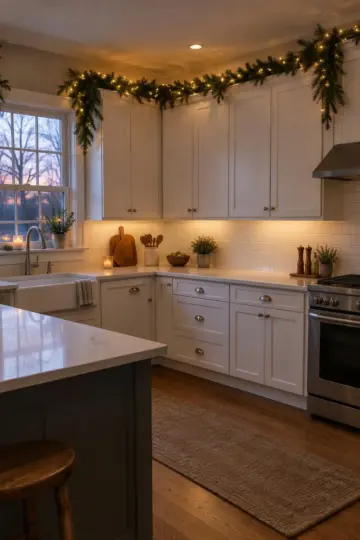
A full pine garland runs the whole length of the upper cabinets, right along the front edge. Warm white lights glow through the needles. At each corner, the greens drape down a few inches over the cabinet side.
Greens at the front edge hide the dusty gap and draw a soft line of light near the ceiling. Battery packs with a timer mean no cord hangs down to an outlet. Set the timer once for six hours, and you can skip the ladder until January.
Copy it: Measure the cabinet run, add two feet, and buy faux garland to that length. (about 30 minutes, cost $$)
Row of Snowy Trees in Mixed Heights
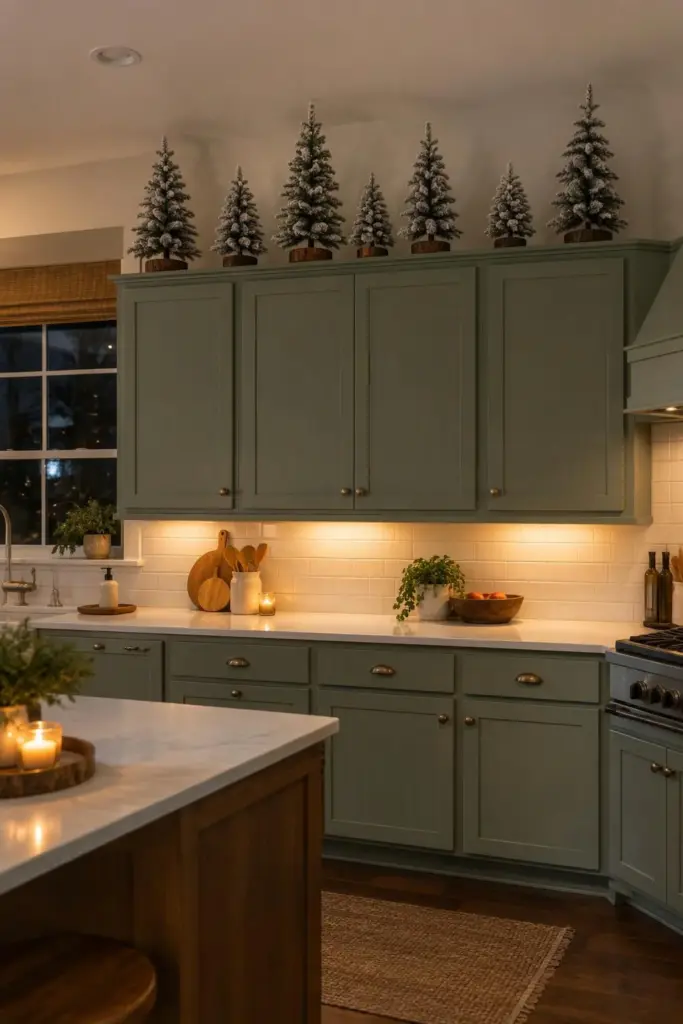
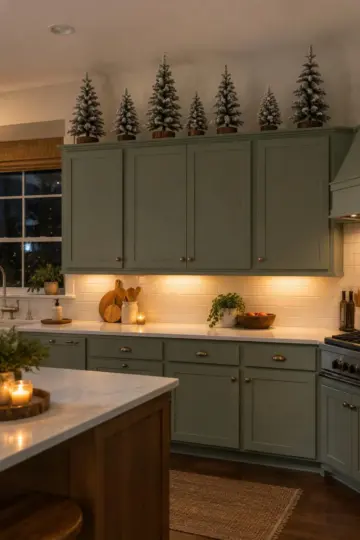
Seven snowy tabletop pines stand in a loose row above the cabinets. Heights step from one foot up to almost three. Wood slice bases keep each trunk steady.
Trees fill a tall gap better than anything flat. Odd numbers and mixed heights read like a real tree line. Push the tallest ones toward the corners, where the eye wants weight, and leave small ones over the sink.
Copy it: Line up seven flocked trees on the counter first and sort them by height. (about 20 minutes, cost $$$)
Glowing Ceramic Village on Snow
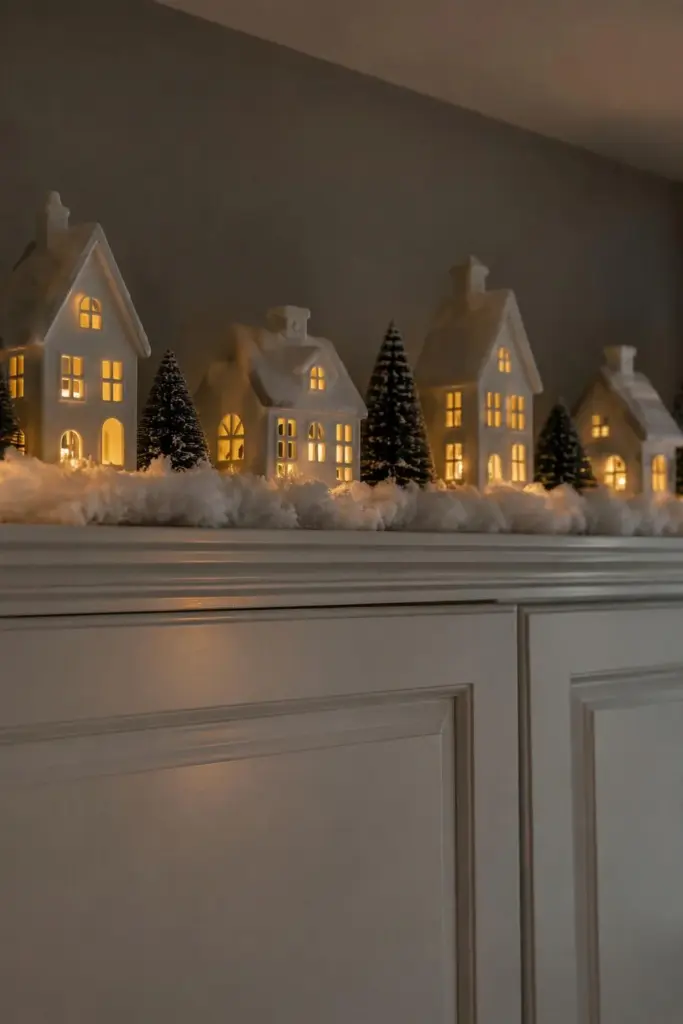
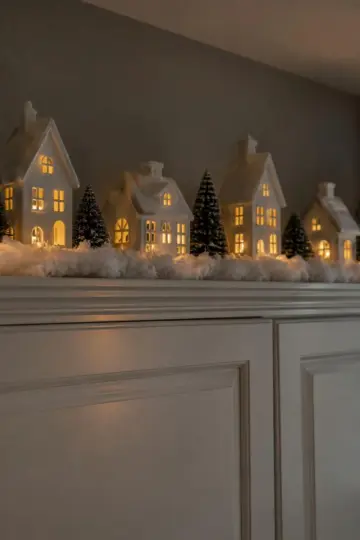
White ceramic houses sit in a line on a strip of fluffy snow blanket. Each window glows yellow from a small light inside. Tiny pine trees fill the spaces between the roofs.
Villages need a long, narrow shelf, and cabinet tops are just that. Up high, the houses are safe from elbows and curious cats. Choose battery tea lights with a remote, so one click turns on the whole street.
Copy it: Roll out a strip of snow blanket and space five houses along it. (about 25 minutes, cost $$)
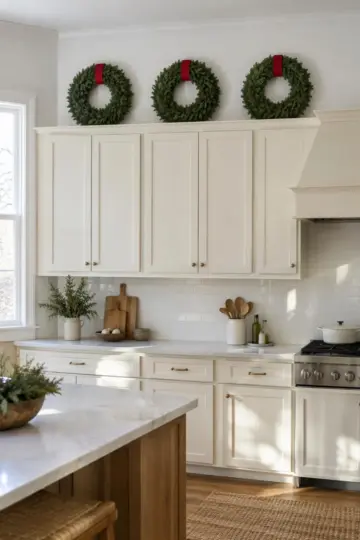
Three Leaning Wreaths
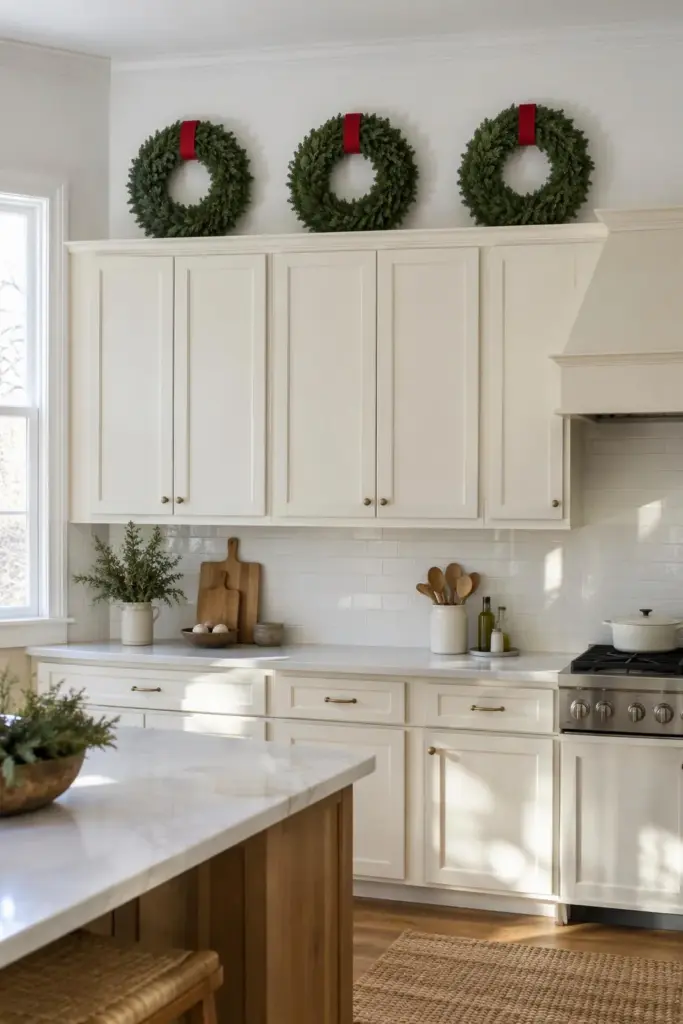
Three plain green wreaths lean against the wall above the cabinets, evenly spaced. Red ribbon wraps the top of each one in a flat band. No ornaments, no lights, just circles of green.
Round shapes break up all the straight lines of cabinet doors. Leaning takes no nails and no hooks. Prop a small block of floral foam behind each wreath, or it slides flat the first time a door slams.
Copy it: Space three wreaths of the same size evenly along the longest cabinet run. (about 15 minutes, cost $$)
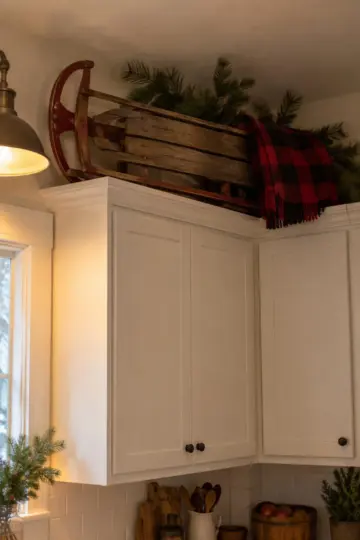
Wooden Sled With a Plaid Blanket
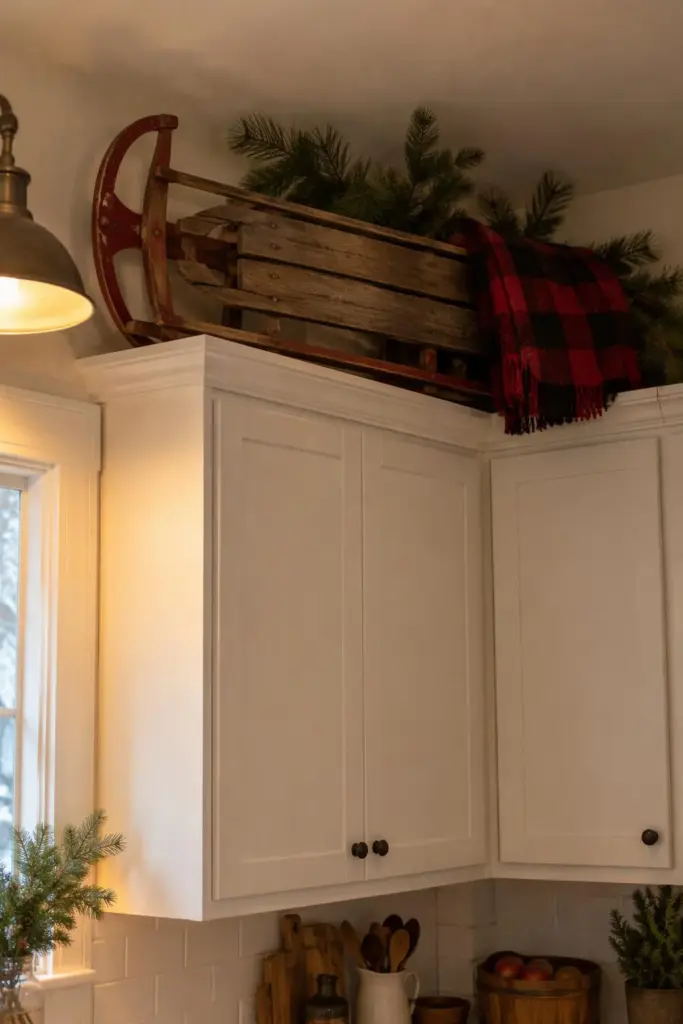
An old wooden sled with red metal runners lies on its side above the corner cabinets. Folded over one end is a red and black plaid blanket. Pine branches fill the space behind it.
Big single pieces look calmer than twenty small ones. Sleds are long and low, which fits the gap like it was built for it. Lay it with the runners toward the room, so the red shows from the floor.
Copy it: Pass the sled up to a helper on the ladder and rest it flat on its side. (about 15 minutes, cost $$)
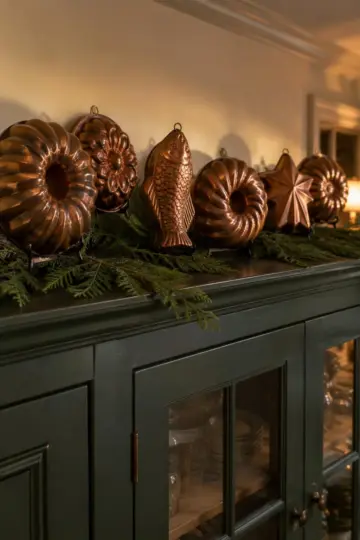
Copper Molds in Cedar
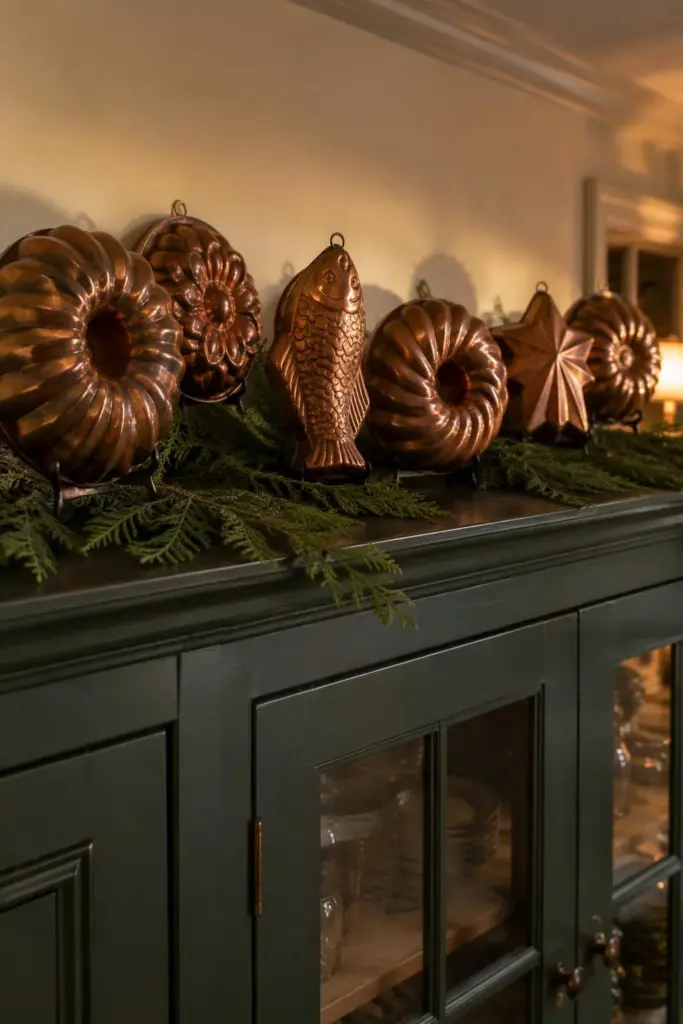
Six copper molds stand on their edges along the cabinet tops. Fluted rings, a fish, and a star catch the kitchen light. Flat cedar sprays lie under and between them.
Copper glows warm against green and suits a kitchen more than tinsel does. Old molds turn up at yard sales for very little. Stand each one in a small plate stand, since a mold laid flat vanishes from below.
Copy it: Set six plate stands along the cabinet top and rest one mold in each. (about 20 minutes, cost $$)
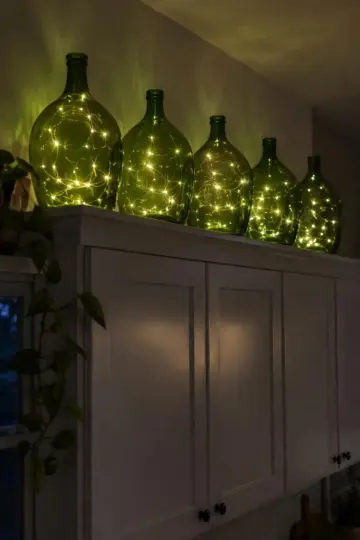
Green Glass Jugs With Fairy Lights
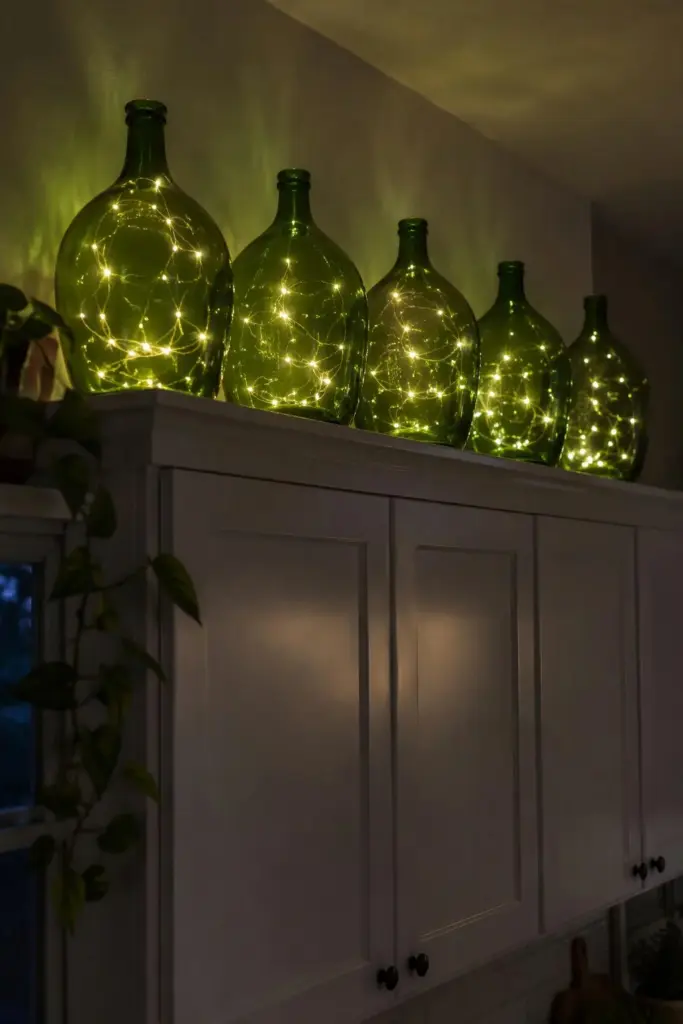
Five large green glass jugs stand along the cabinet tops. Inside each one, a string of tiny warm lights coils like fireflies. Light through the colored glass tints the wall a soft green.
Glass glows from within, which reads well from across the house. Jugs are tall enough to fill the gap alone, with no filler needed. Pick light strings with the battery pack built into a cork, so nothing shows.
Copy it: Feed one string of micro lights into each jug and press the cork in. (about 15 minutes, cost $$)
Giant Red Ornaments in Greenery
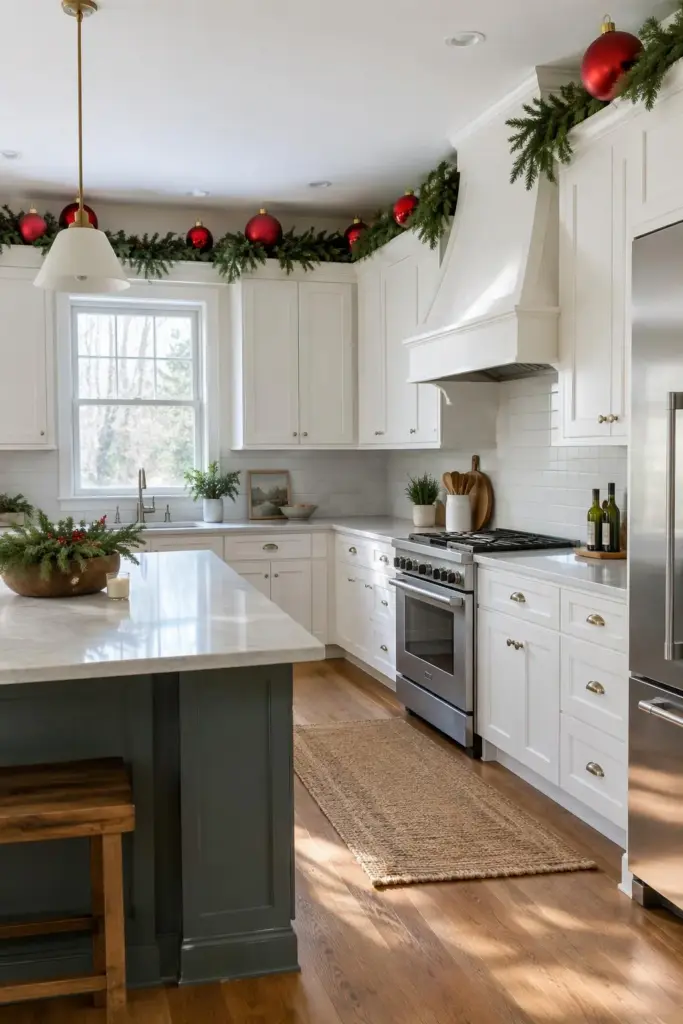
Oversized red ornaments, each as big as a grapefruit, rest in a bed of faux pine above the cabinets. Some are shiny and some are matte. Gold caps catch the light.
Small ornaments disappear at that height, so size is the whole trick. Red against green is the fastest way to say Christmas. Use shatterproof ones only, and wedge each ball into the greens so it cannot roll off the edge.
Copy it: Lay down faux pine picks and settle nine large red ornaments into them. (about 15 minutes, cost $$)
Ironstone Pitchers of Holly
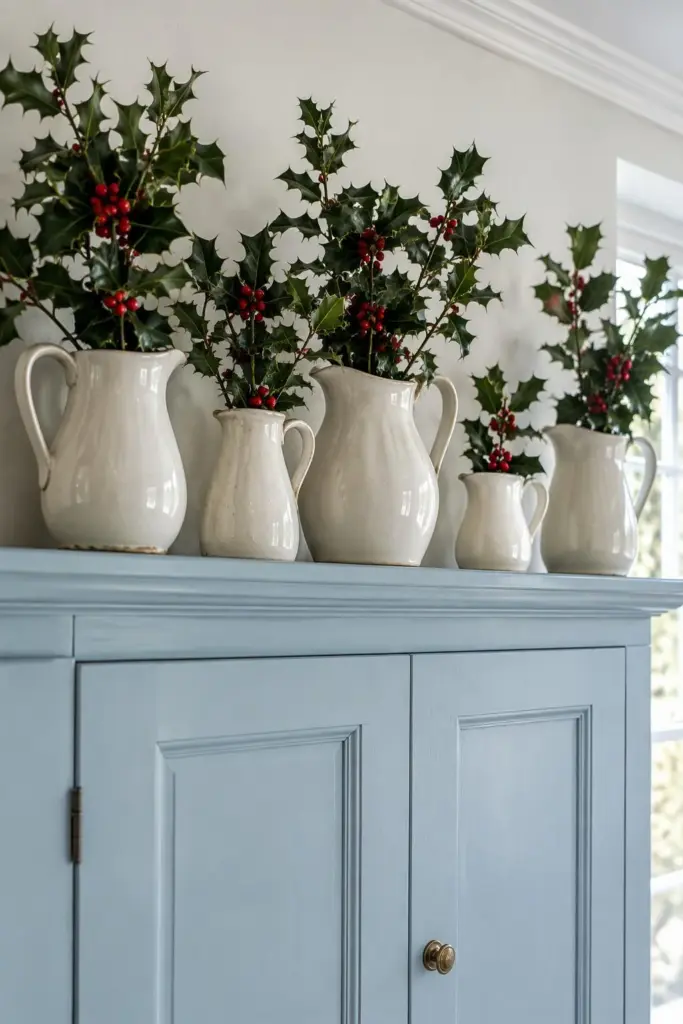
Five cream ironstone pitchers of different sizes line up above the cabinets on the sink wall. Holly with red berries stands in each one. Glossy leaves spill over the rims.
Cream pottery looks collected, not store bought. Branches hold their shape for weeks with no water. Keep this one away from the cabinets beside the stove, since rising heat dries the leaves and makes berries drop.
Copy it: Arrange the pitchers from tall to short and drop two holly stems in each. (about 15 minutes, cost $$)
White Deer in a Birch Forest
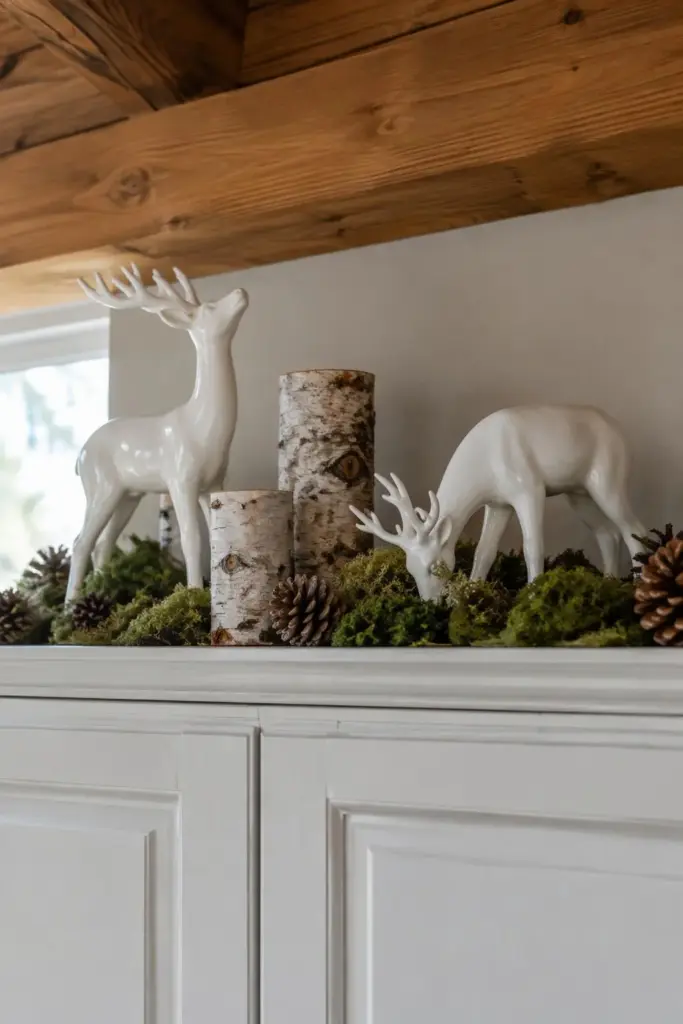
Two white ceramic deer stand among short birch logs above the cabinets. One looks up and one bends to graze. Loose moss and a few pinecones cover the cabinet top around them.
Animals give the display a story, like a little woodland scene. Birch bark ties in with white cabinets and adds texture. Cut the logs to three heights and stand them on end, which builds a forest in a foot of space.
Copy it: Stand nine birch logs in a loose group and place the deer in front. (about 20 minutes, cost $$)
Wicker Baskets of Red Poinsettias
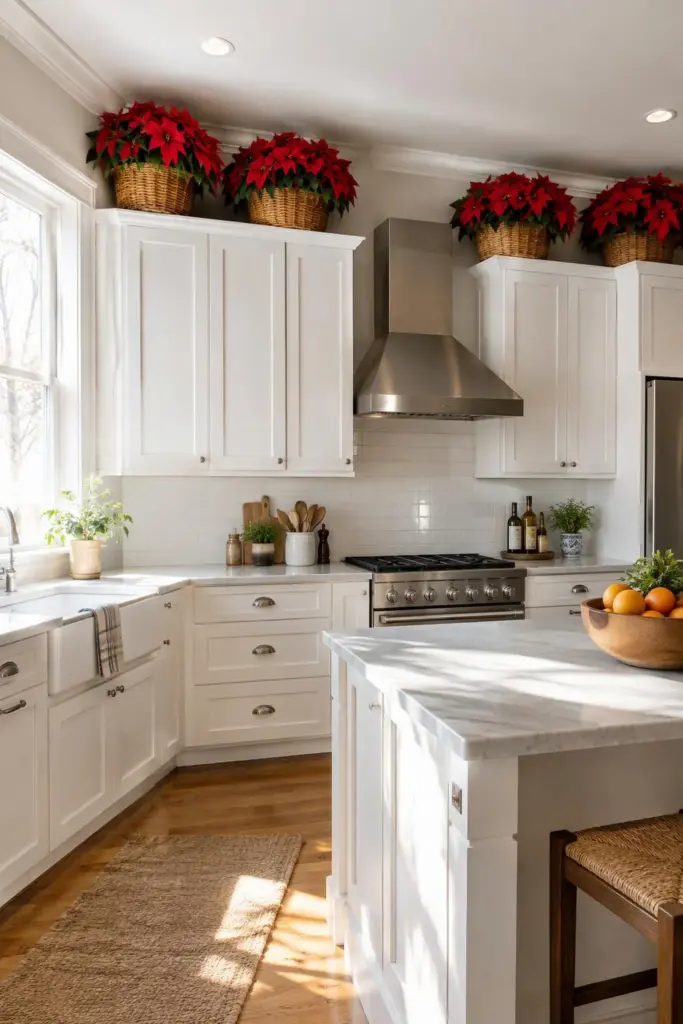
Four wicker baskets sit above the cabinets, and each one overflows with red poinsettias. Big petals hang over the woven rims. Honey colored wicker warms up the white ceiling line.
Poinsettias give the largest splash of red for the least effort. Faux stems are the smart pick here, since nobody wants to water plants from a ladder. Stuff the bottom of each basket with newspaper, and three stems look like a dozen.
Copy it: Fill four matching baskets with crumpled paper and push in faux poinsettia stems. (about 20 minutes, cost $$)
Towers of Cookie Tins
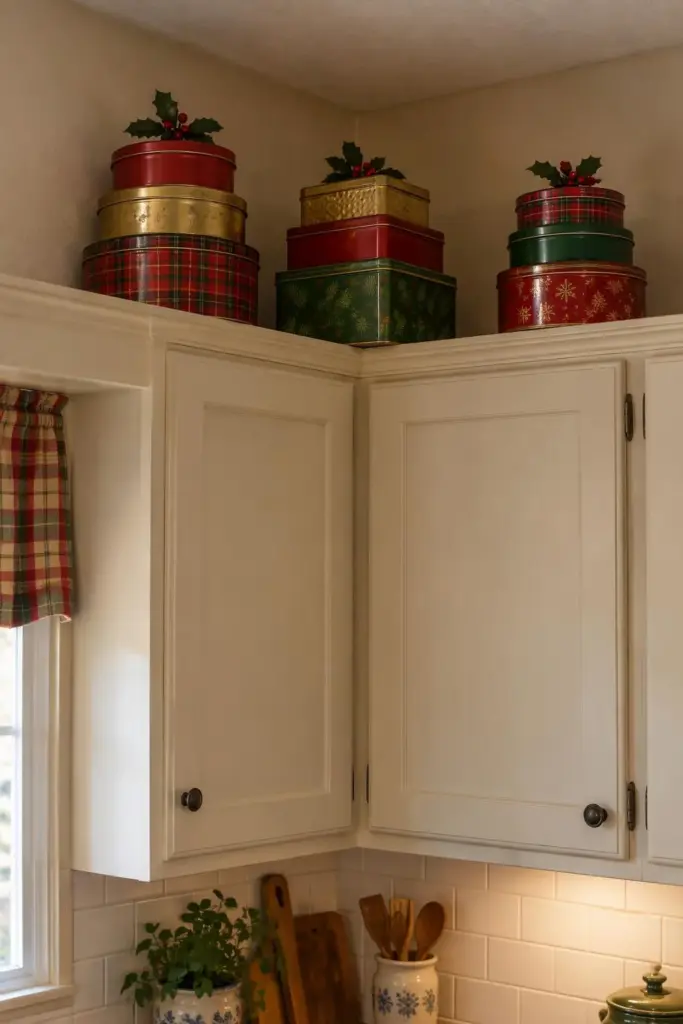
Round and square cookie tins in red, green, and gold stack in three short towers above the cabinets. Plaid, stripes, and plain colors mix. A sprig of faux holly tops each tower.
Tins are light, cheap, and easy to lift down. Stacks add height without one tall heavy piece. Turn any tin with writing toward the wall, and the towers look like a matched set.
Copy it: Stack three tins from large to small and repeat twice along the cabinets. (about 10 minutes, cost $)
When to Set This Up
Do the climbing once, on the first weekend of December, and plan the full display on the counter before anything goes up. Use a sturdy step ladder on a dry floor, and leave the cabinets beside and above the stove bare, since heat and grease rise there.
Skip These Mistakes
- Pieces that are too small. Anything under eight inches tall vanishes when you stand on the floor.
- Decor over the stove. Heat and grease rise, so keep greens, paper, and lights away from that section.
- Cords hanging down the cabinet side. Choose battery lights with timers and hide the packs behind the greens.
Quick Answers
How do you decorate above kitchen cabinets for Christmas? Lay a base of garland along the front edge, then add a few large pieces such as trees, wreaths, or lit houses. Keep to two or three colors so it looks planned.
How tall should decor above cabinets be? Aim for pieces that fill about two thirds of the gap. Leave a few inches of open space below the ceiling so the display does not look jammed in.
Is it safe to put lights above kitchen cabinets? Yes, if you use cool LED lights on batteries or a proper outlet. Keep them away from the stove area, and put them on a timer so they switch off overnight.
That empty strip under the ceiling is the easiest place in the kitchen to decorate, since nothing up there gets in the way. One good afternoon on the ladder lasts all month. When the top is done, see kitchen island Christmas decor ideas and kitchen window Christmas decor ideas next.
Read Next
- 12 Kitchen Island Christmas Decor Ideas That Leave Room to Cook
- 12 Kitchen Window Christmas Decor Ideas to Enjoy While You Wash Up
- 14 Christmas Kitchen Tray and Counter Ideas You Can Style in Minutes
Save This for Later