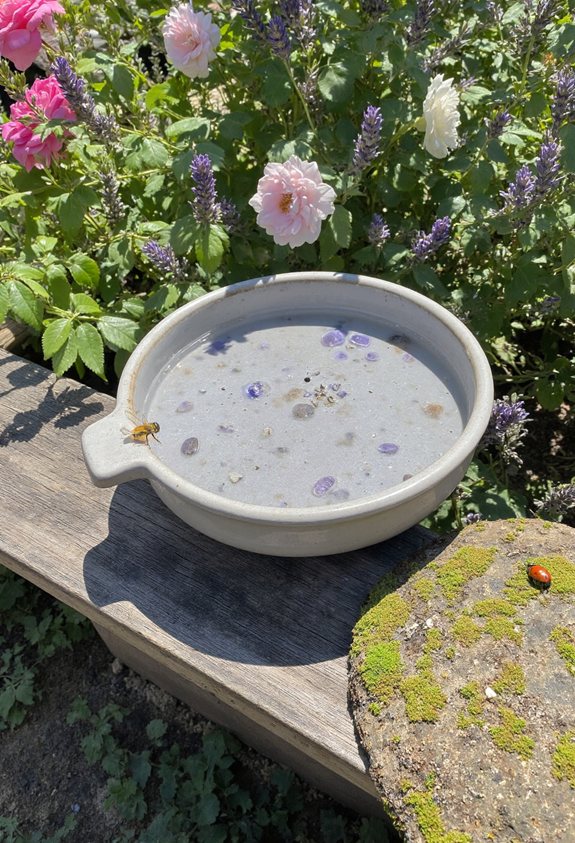
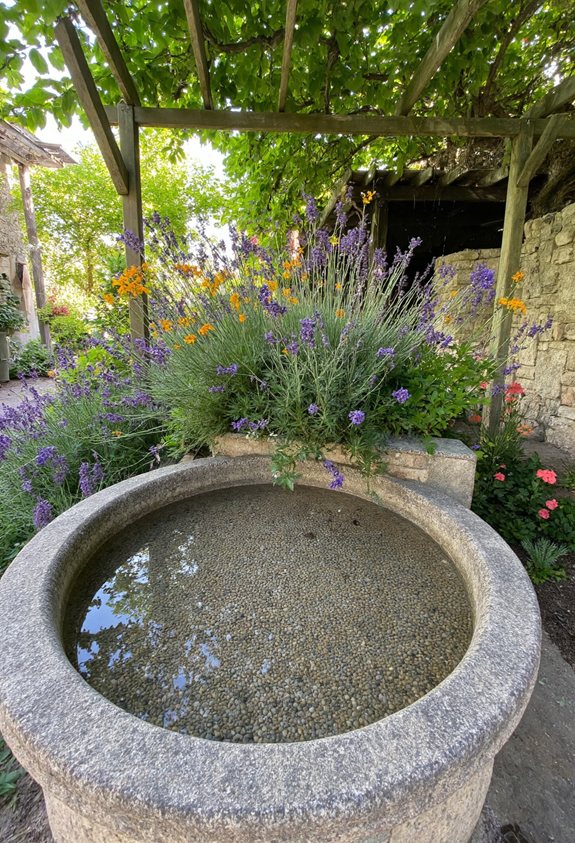
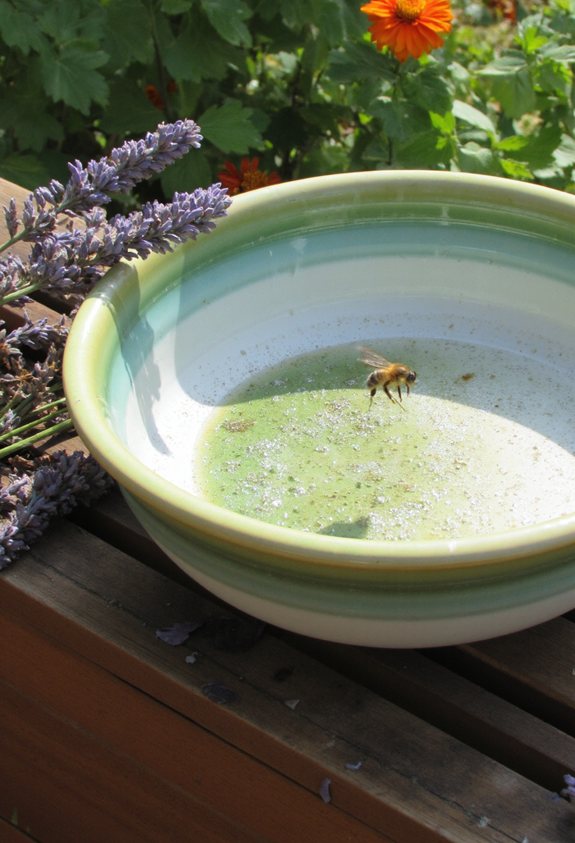
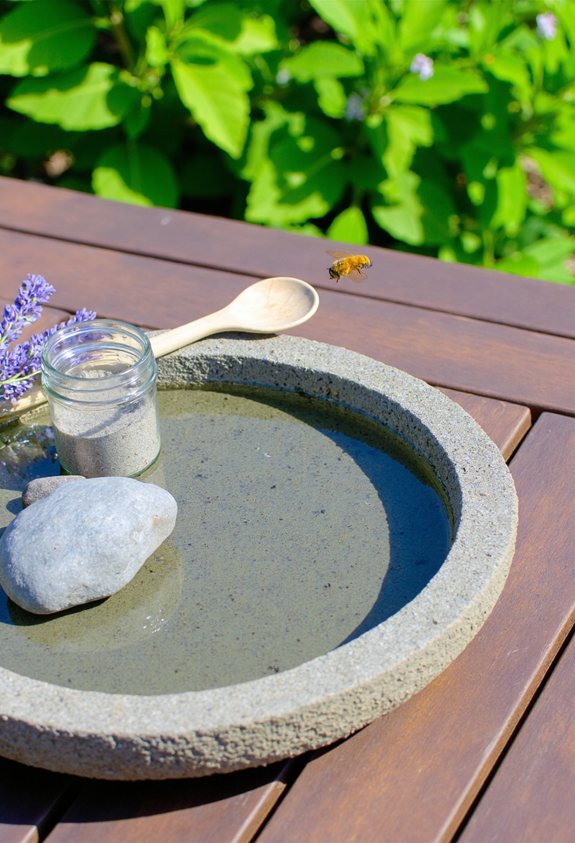
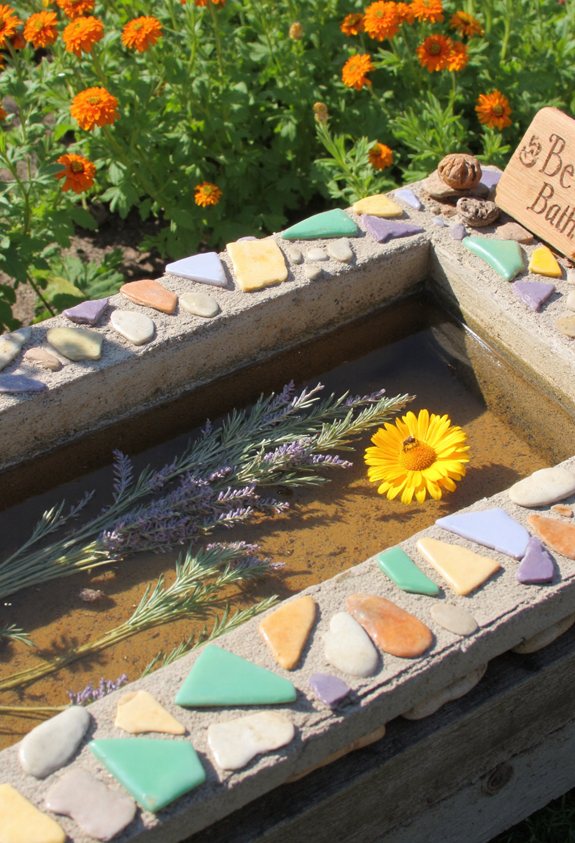
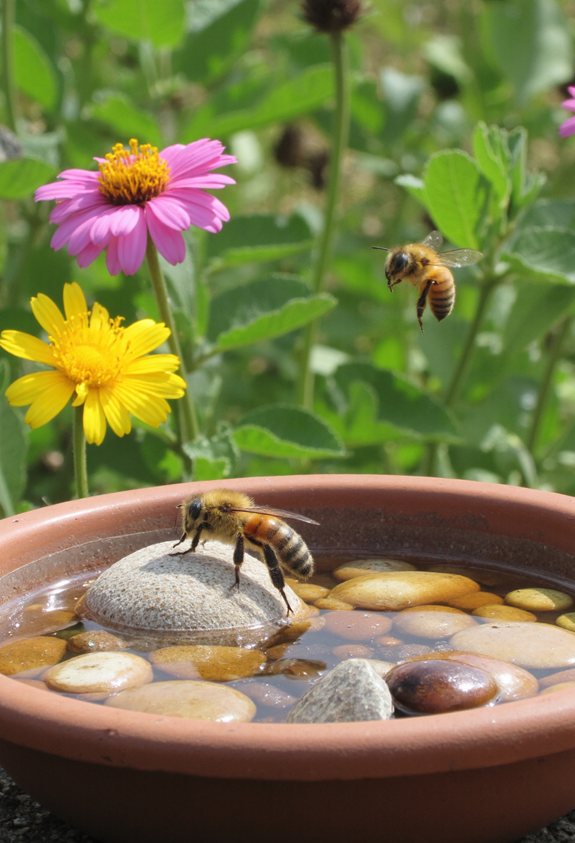
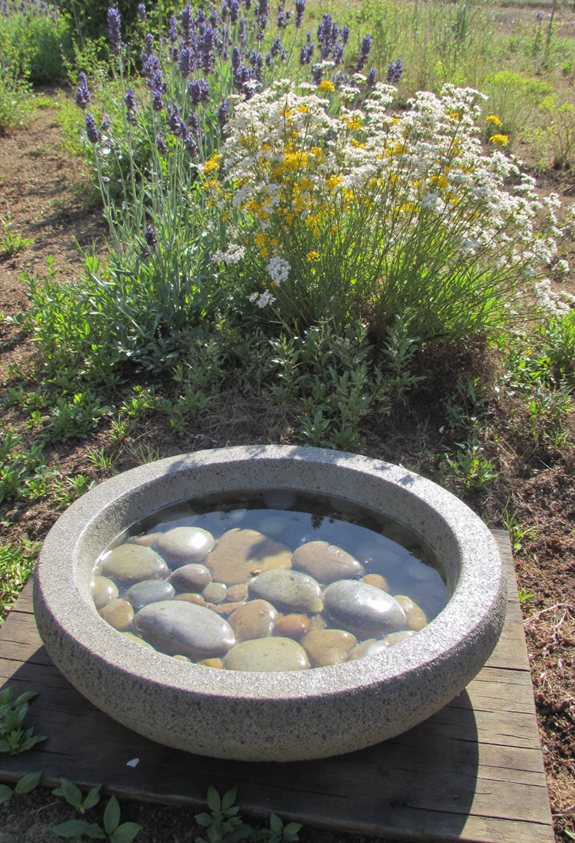
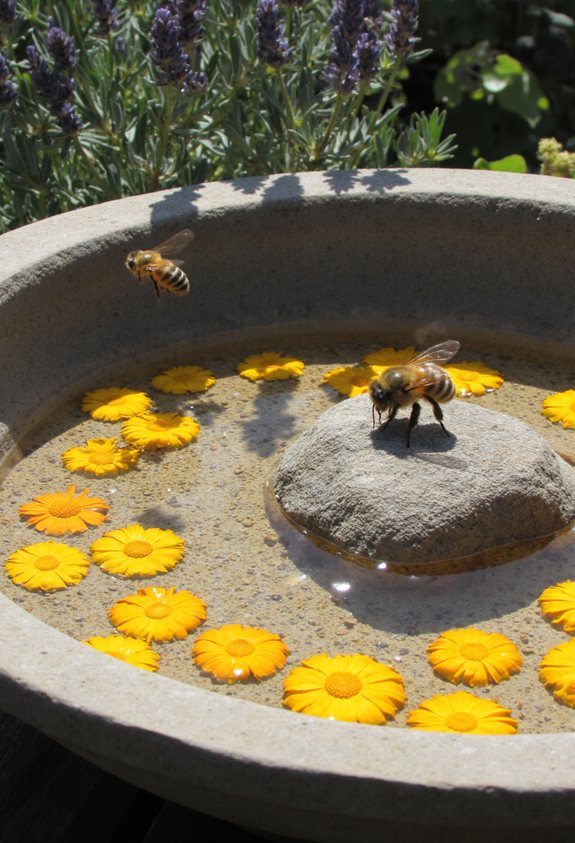
Grab a shallow, bright‑colored pot, fill it with fresh water, and toss in a handful of smooth river rocks so bees can land without slipping. Add a tiny splash of sugar water (one tablespoon per gallon) for extra energy, then place the bath near blooming flowers but away from heavy foot traffic.
Keep it topped up daily, skim off debris, and protect it from rain with a light cover. This simple setup boosts pollination, fruit yield, and bee health—plus, you’ll see buzzing visitors in no time, and the next steps will show you how to fine‑tune it for any season.
Why a Bee Bath Boosts Garden Health
When you set up a bee bath, you’re basically giving your garden a fresh water source that’s as inviting to pollinators as a lemonade stand is to kids on a hot day. You’ll notice more bees buzzing, which means better pollination of flowers and veggies. Those busy insects spread pollen, boost fruit yields, and keep your garden thriving with vibrant colors and tasty harvests. Additionally, creating a bee-friendly environment aligns with the Earth Care principle of permaculture, fostering a sustainable ecosystem for all garden inhabitants.
What Bees Need to Stay Hydrated?
You’ll quickly discover that bees don’t just sip plain water—they need a splash of moisture plus a pinch of minerals to keep buzzing happily. Offer them shallow dishes with pebbles, a few drops of sugar water, a splash of apple juice, and a tiny stone for perching. Incorporating natural elements in outdoor designs can enhance not only the aesthetics of your garden but also provide beneficial habitats for these important pollinators.
- Shallow water with pebbles
- Light sugar solution
- Diluted fruit juice
- Small stone or bark for landing
Core Benefits of DIY Bee Baths
Even if you think a tiny dish of water is just a garnish for your garden, a DIY bee bath actually gives buzzing visitors a lifeline that boosts their health, productivity, and happiness. You’ll notice stronger pollination as bees sip and refuel, their colonies thrive, and you’ll feel pride watching them dance. The bath also reduces stress, keeping bees energetic and your garden blooming. Additionally, creating a habitat that includes optimal conditions for bee health can further enhance their well-being and effectiveness in pollination.
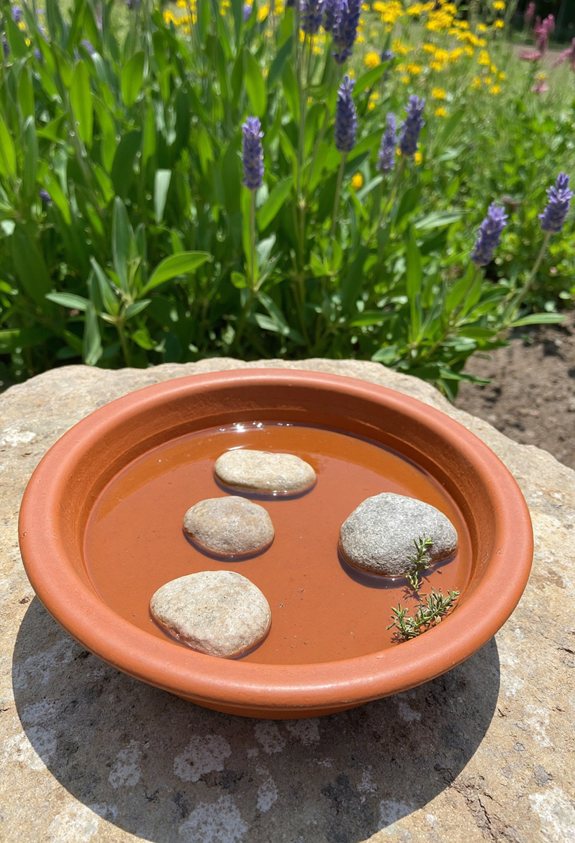
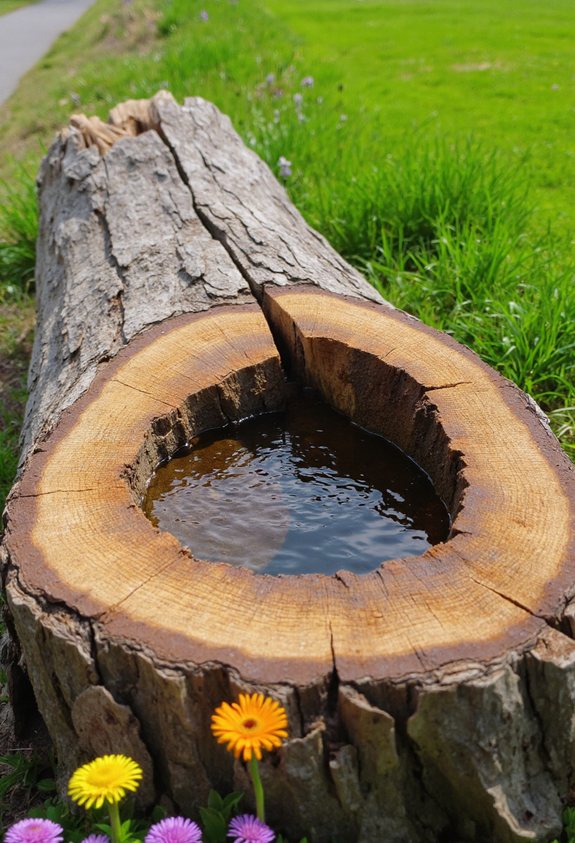
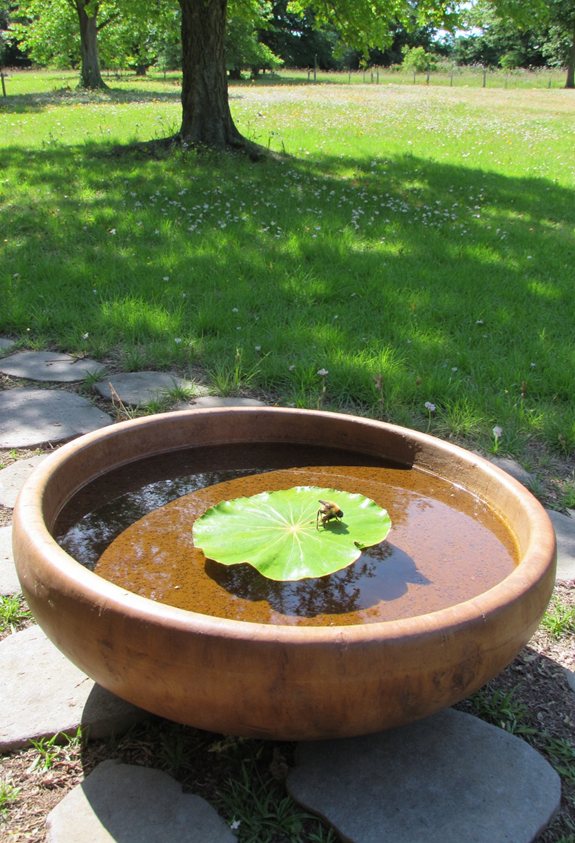
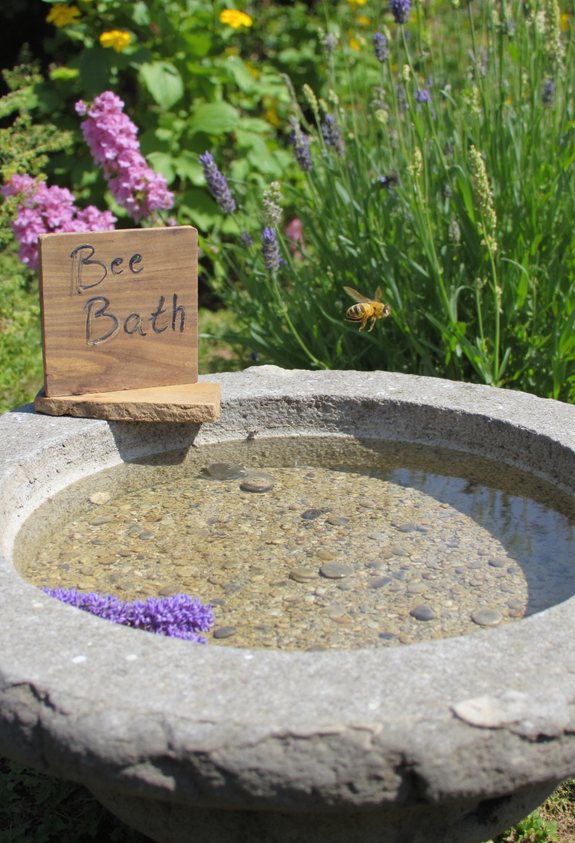
Choosing the Right Container for Your Bee Bath
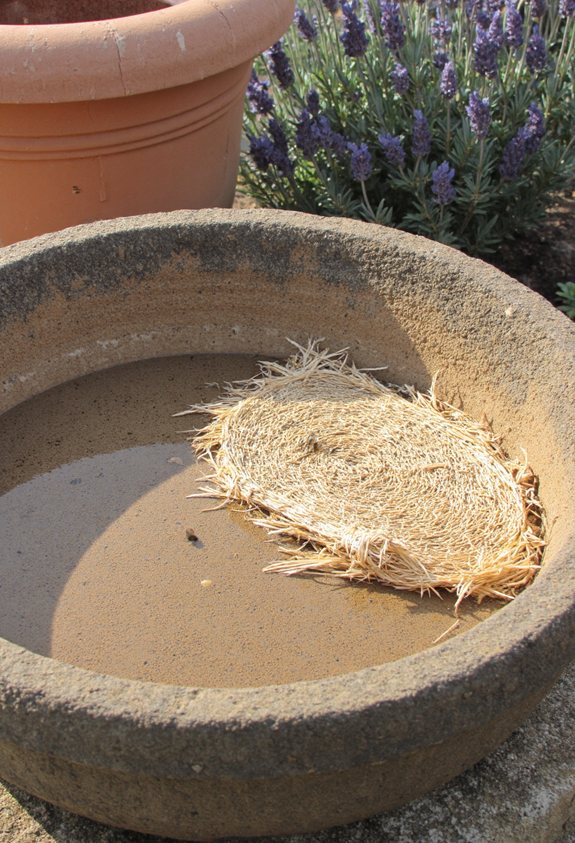
If you want bees to feel right at home, start by picking a container that’s both inviting and practical. Choose something shallow, stable, and weather‑proof so bees can land safely and splash without flooding your garden.
A bright color attracts them, and a simple design keeps maintenance easy.
- Shallow dish or tray
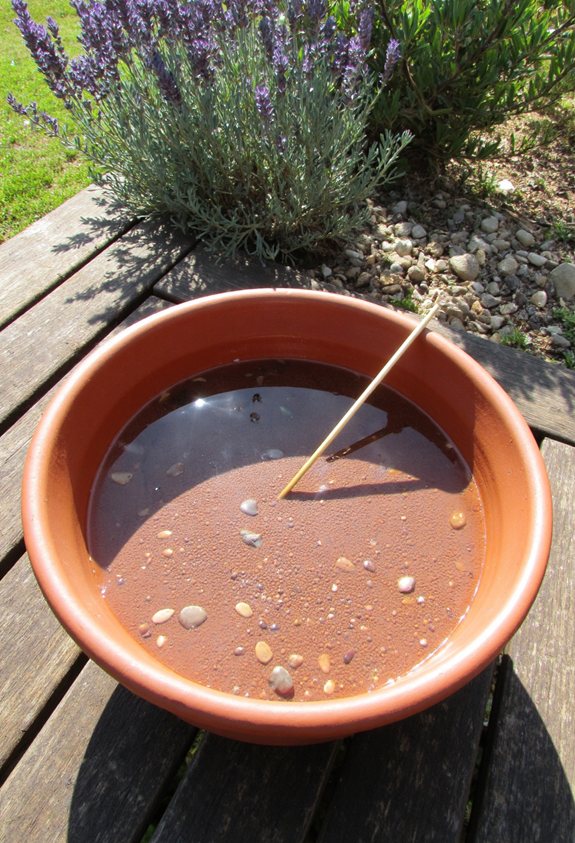
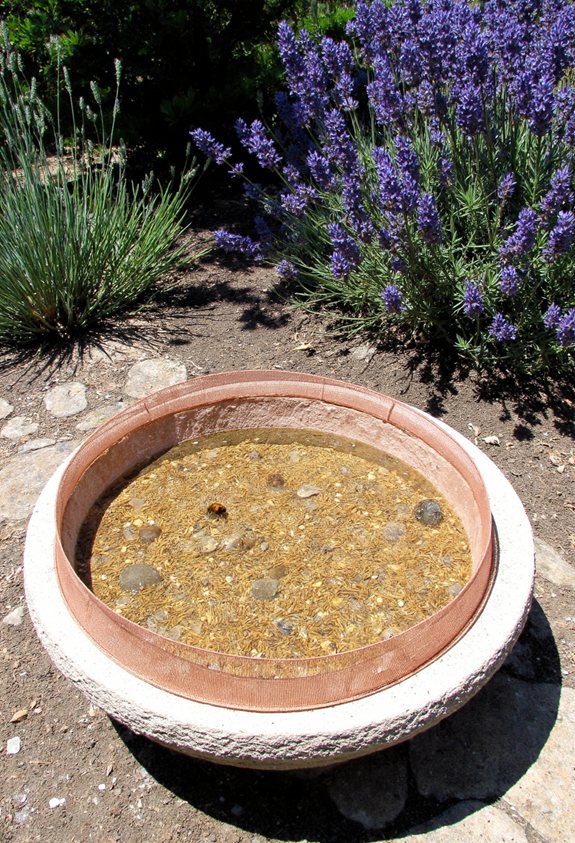
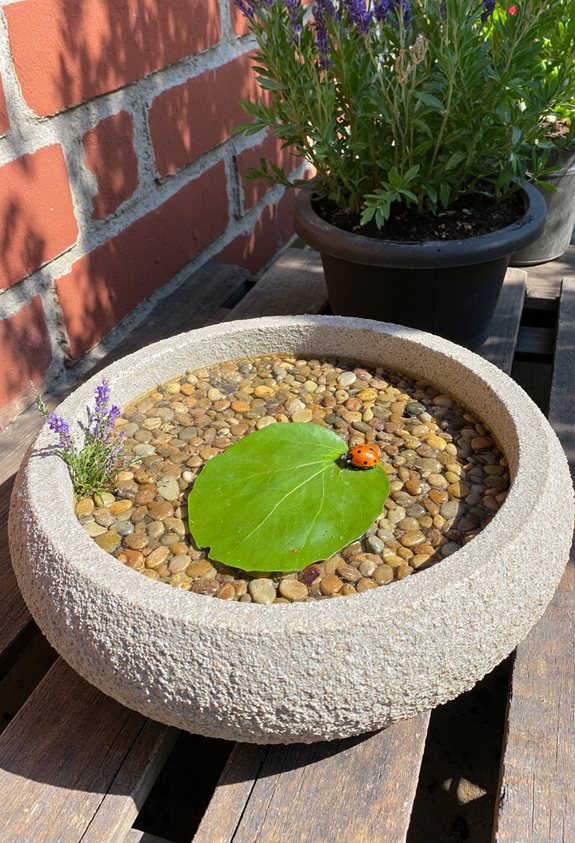
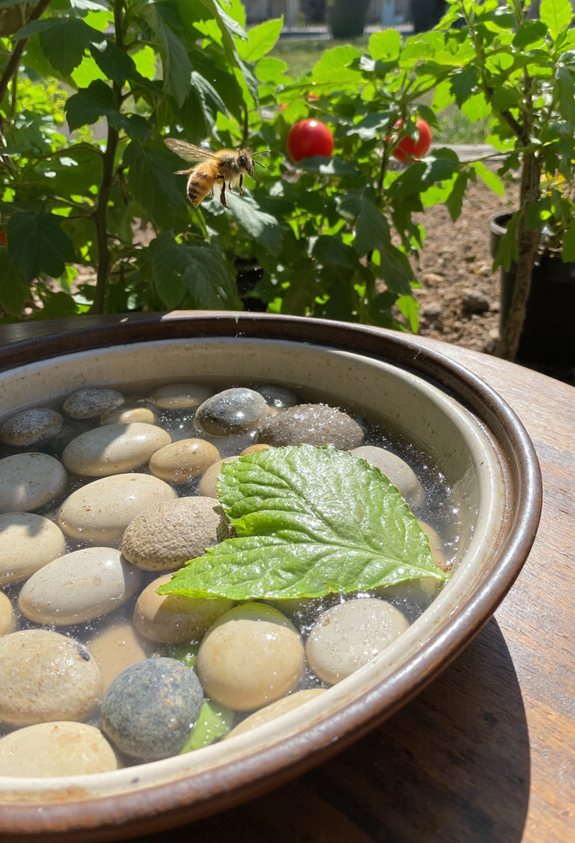
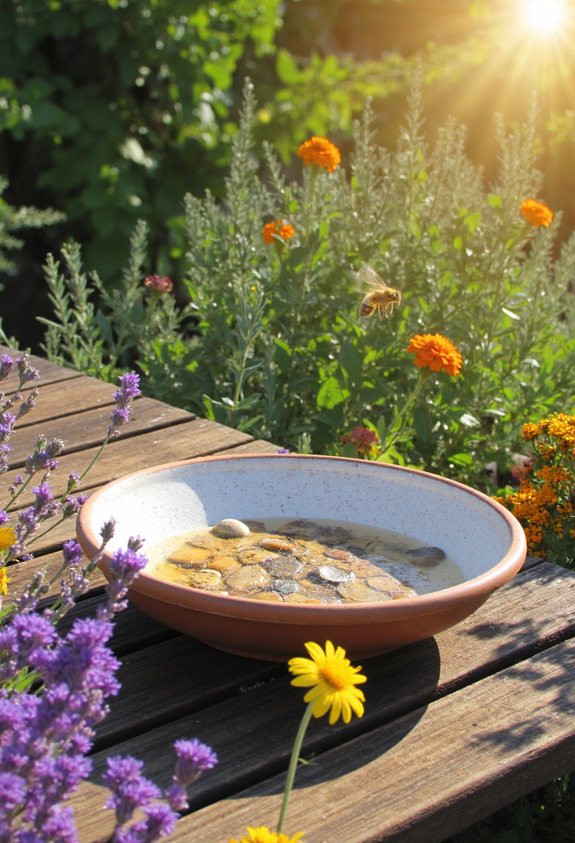
- Ceramic or terra‑cotta pot
- Plastic basin with drainage holes
- Repurposed tin or metal bucket
Additionally, using a bright, indirect light setting can help enhance the visual appeal of your bee bath, making it more attractive to not only bees but other garden pollinators as well.
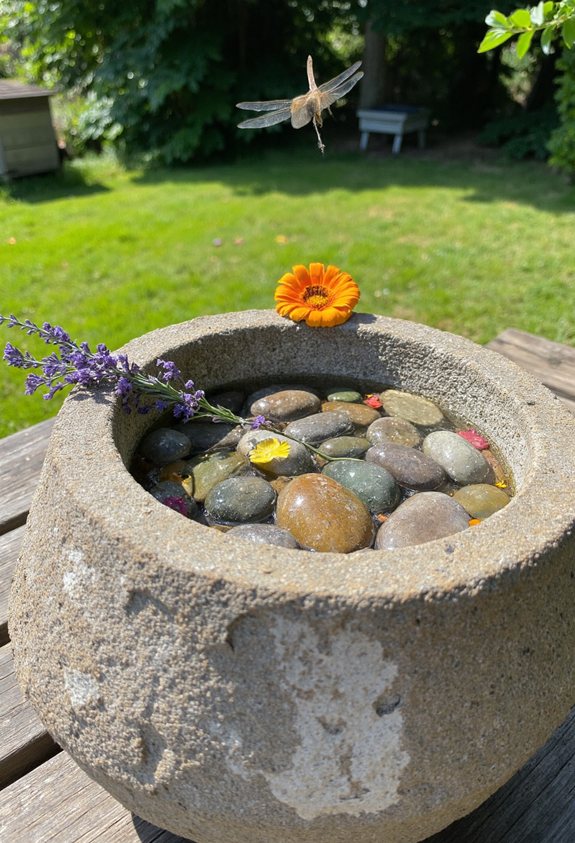
Selecting Stones, Pebbles, and Substrate Materials
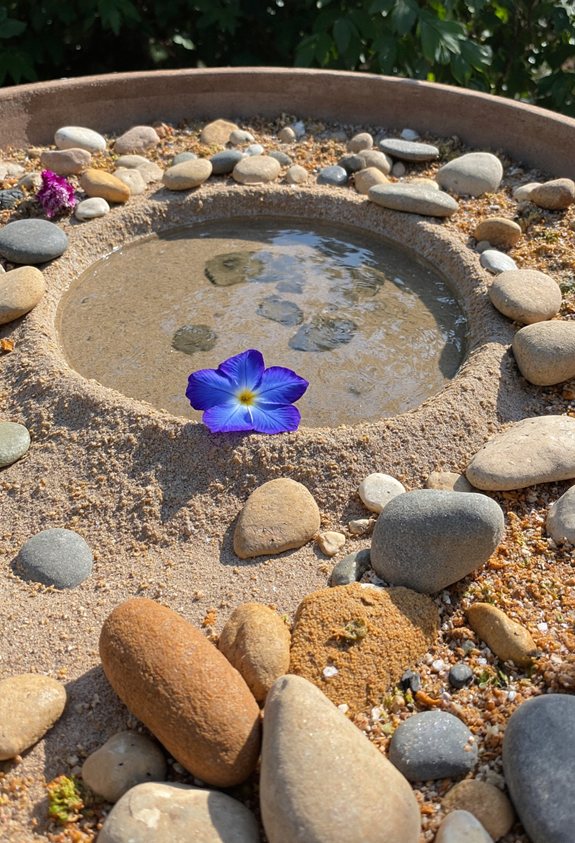
When you’re picking stones, pebbles, and other substrate for your bee bath, think of it like setting up a tiny spa for the buzzing guests.
Choose smooth river rocks or flat pebbles so bees can land without bruises.
Mix in a few pieces of porous clay or wood chips for texture, but avoid sharp shards.
Natural colors blend with garden décor, making the bath inviting and safe.
How Much Water Is Ideal for a Bee Bath?
Although a bee bath doesn’t need a giant pond, the amount of water you provide can make or break the buzzing party. Aim for a shallow basin—about 2‑3 inches deep—so bees can land without drowning. Keep the surface calm, refill when it evaporates, and change it weekly to prevent slime. Additionally, consider adding decorative elements like pebbles to create landing spots for the bees.
- 2‑3 inches depth
- Shallow, wide surface
- Fresh water weekly
- No standing algae
Adding Natural Sugar – What Type and How Much?

After filling the shallow basin with fresh water, you’ll want to add a sweet boost to keep the buzzers buzzing.
Use plain granulated sugar or raw honey—no artificial sweeteners. Dissolve one tablespoon per gallon of water, stirring until fully dissolved.
This concentration gives bees energy without overwhelming them, and the natural taste mimics nectar, encouraging frequent visits to your garden oasis. Additionally, incorporating natural homemade fertilizers can create a flourishing environment that attracts even more pollinators to your garden.
Avoiding Harmful Additives in Your Bee Bath
Ever wondered why some bee baths turn into a sticky mess that actually harms the insects you’re trying to help? You can avoid that by skipping harmful additives and keeping things natural. Here’s what to stay away from:
- Artificial sweeteners
- Food coloring
- Fragrance oils
- Chemical detergents
Consider creating a calming atmosphere in your garden to further support the bees’ natural behavior and foraging habits, enhancing their overall well-being through mindful gardening practices.
Step‑by‑Step Assembly of a Basic Bee Bath

If you’ve ever tried to make a bee bath and ended up with a soggy mess, you know how frustrating it can be, but the good news is that assembling a simple, effective bee bath is easier than you think.
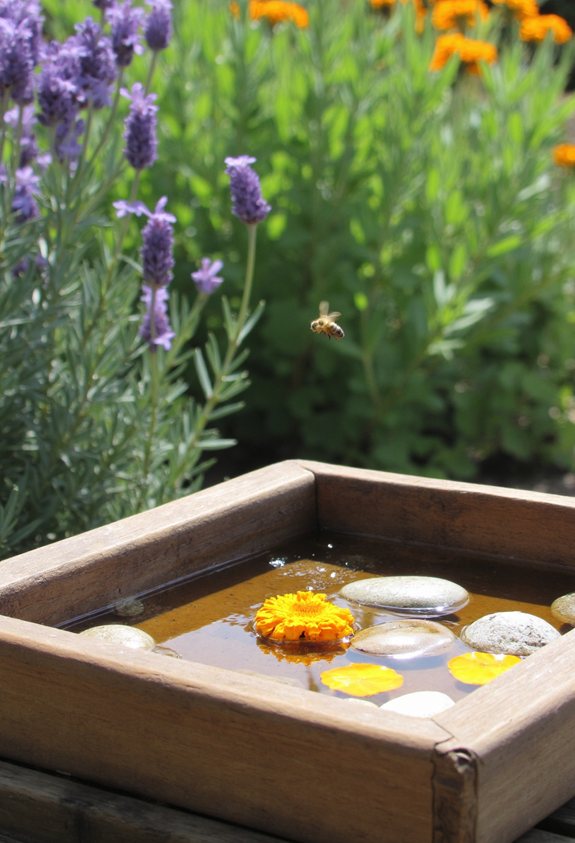
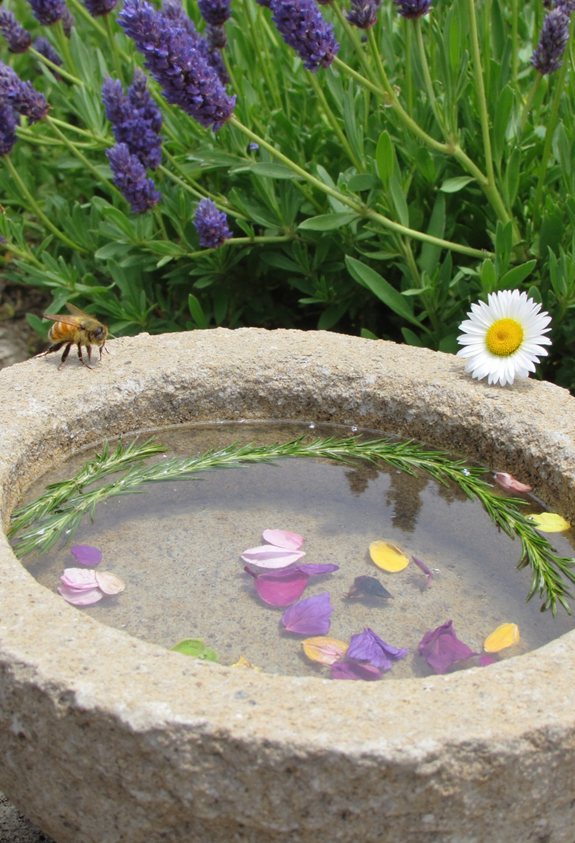
Grab a shallow dish, fill it with pebbles, add a splash of water, sprinkle a few herbs, and place a small rock for bees to land on. To enhance your garden’s appeal to beneficial insects, consider incorporating natural pest management practices through companion planting.
Check daily, refill as needed, and watch them buzz happily.
Placing the Bath for Maximum Bee Traffic
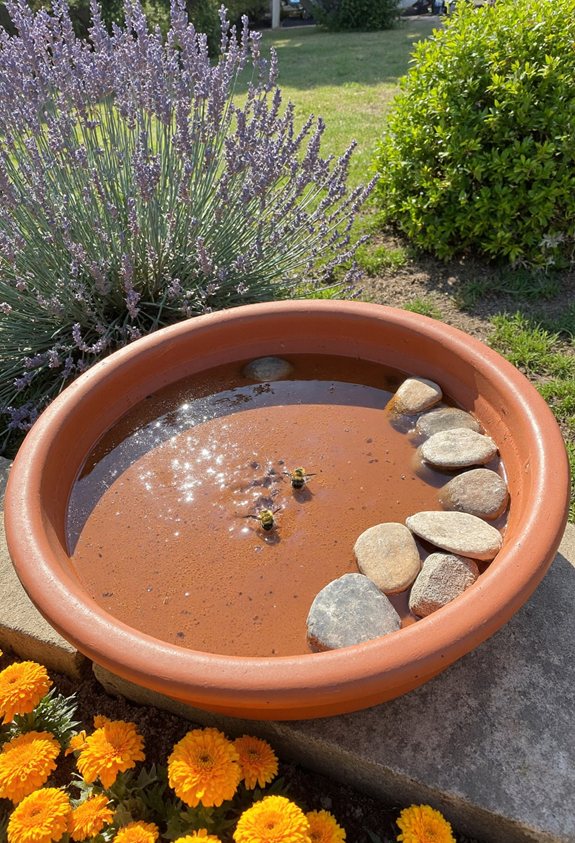
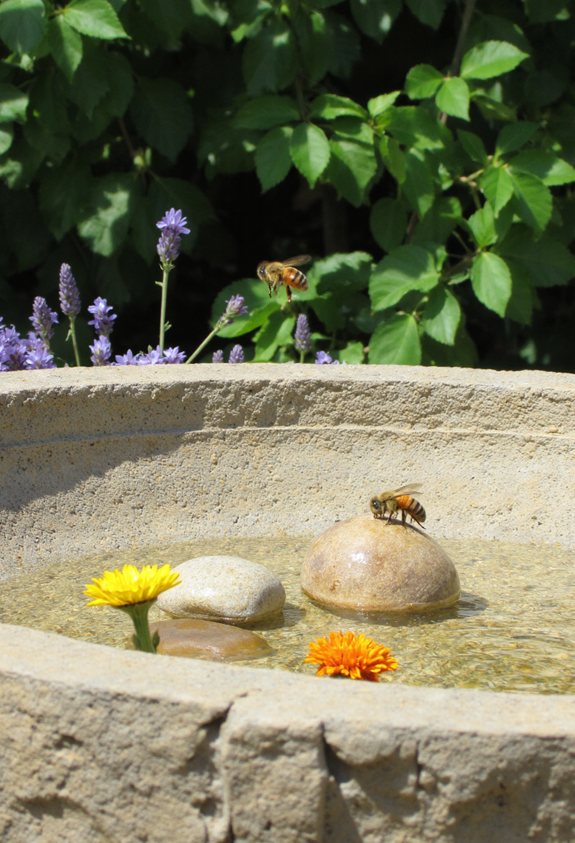
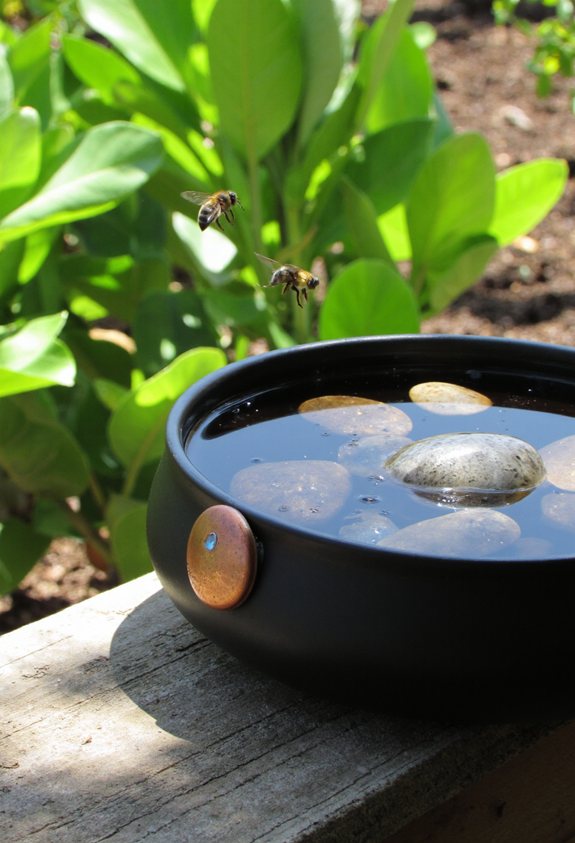
When you choose a sunny spot near flowering plants, your bee bath becomes a buzzing hotspot, because bees love warm, dry edges where they can sip without getting soaked.
Place it where butterflies flutter, but keep it a few feet from heavy foot traffic.
- Near a sunny wall or fence
- Within three feet of blooming herbs
- On a flat, stable surface
- Slightly elevated to avoid puddles
In addition, consider surrounding the bath with colorful flowers, as this not only attracts bees but also enhances the visual appeal of your garden.
Creating Shade and Protection From Rain
You can set up a little canopy or a simple overhang to keep the bee bath dry, and it’s easier than you might think.
Use a garden umbrella, a reclaimed pallet roof, or a bamboo frame with a shade cloth.
Position it so sunlight still filters through, but rain stays off.
A few zip‑ties or clips hold it steady, and bees love the cool, dry spot. Additionally, creating shade not only protects the bee bath but can also attract more pollinators to your garden.
Maintaining Fresh Water – Daily Checklist
Even on the rainiest days, a fresh‑water bee bath can stay inviting if you give it a quick once‑a‑day check‑up.
Keep the water clear, swap out stagnant pools, and make sure the surface isn’t covered with debris.
Your buzzing visitors will thank you for the tidy oasis.
- Refill with fresh water each morning
- Remove dead leaves or twigs
- Gently stir to oxygenate the water
- Check for algae and skim if needed
Cleaning the Bath Without Harming Bees
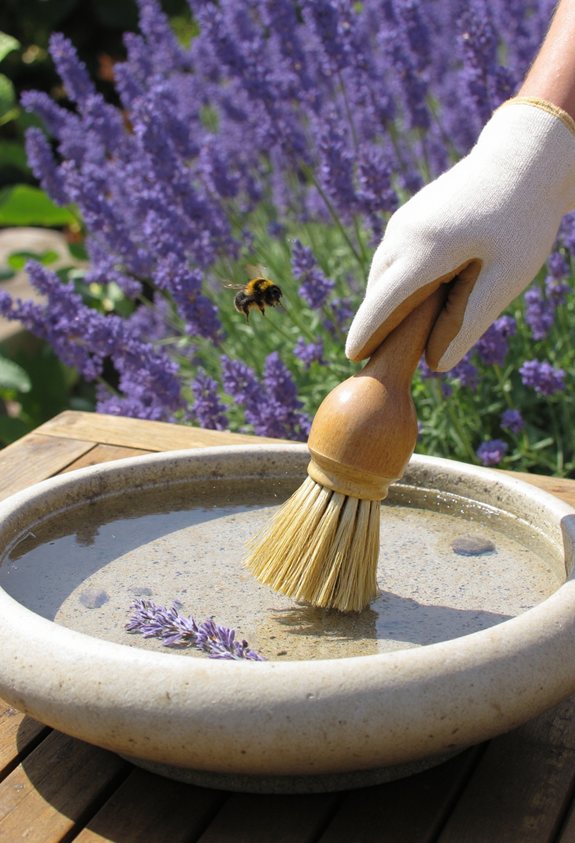
After you’ve checked the water each morning, it’s time to give the bath a quick clean without scaring off your buzzing guests.
Gently scrape away algae with a soft brush, then rinse with lukewarm water—no harsh chemicals.
Replace any wilted flowers, and let the sun dry the basin.
A brief, careful rinse keeps the bees happy and the bath sparkling.
Seasonal Adjustments for Summer Heat
A scorching summer day can turn a bee bath into a tiny sauna, so you’ll want to tweak a few things to keep it cool and inviting.
Shade the bath, add fresh water often, sprinkle pebbles for splash cooling, and plant nearby herbs that attract bees while providing shade.
- Place a lightweight cloth over the rim
- Fill with chilled spring water
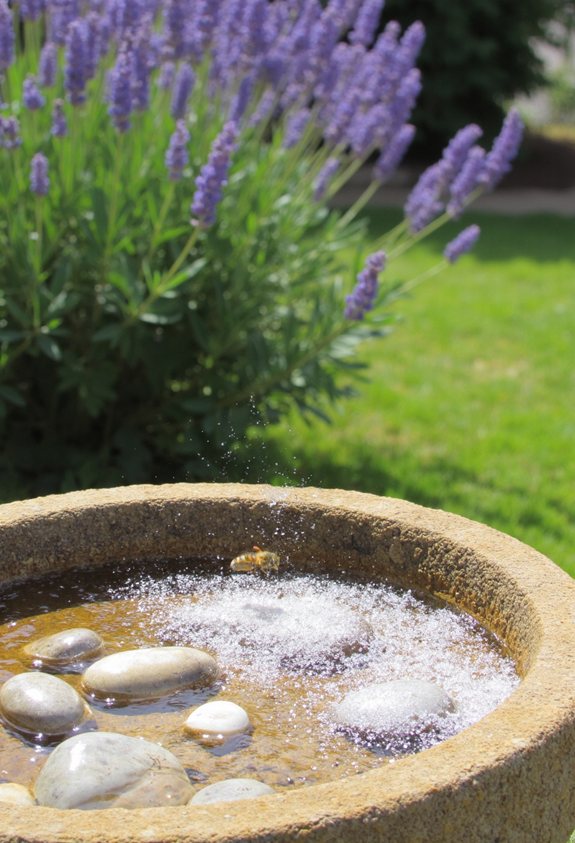
- Add smooth river stones for evaporative cooling
- Surround with lavender or mint for shade and scent
Winter Care – Keeping Bees Safe When Frost Arrives
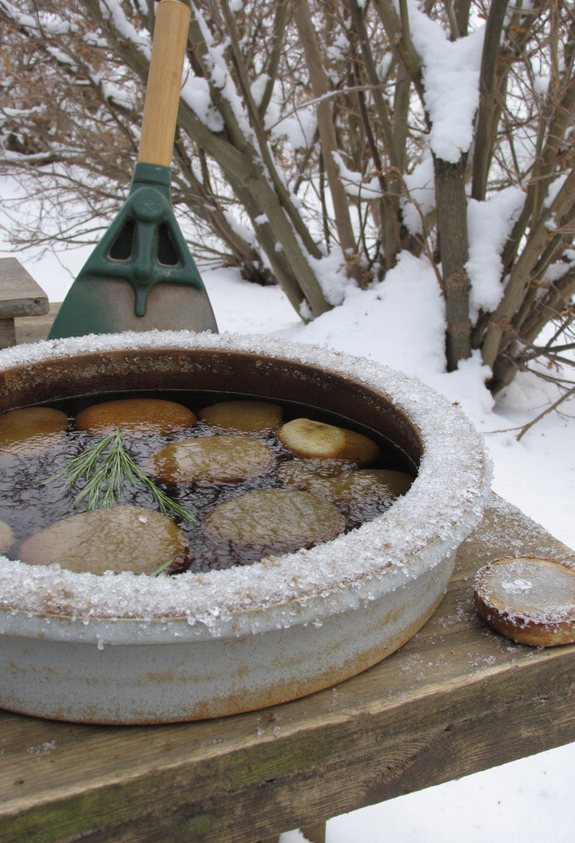
When frost starts to lace the garden, your bee bath can quickly turn into an icy trap if you don’t act fast.
Move the bath into a sunny spot or cover it with a shallow plastic lid to keep water from freezing solid.
Add a few pebbles so bees can land without slipping.
Check daily, and refill with fresh water before the cold deepens.
This simple routine protects your buzzing friends throughout winter.
Using a Drip Tray to Prevent Soil Saturation

If the water in your bee bath keeps spilling onto the soil, the ground can turn into a soggy mess that scares bees away.
A drip tray catches excess liquid, keeping the earth dry and inviting for pollinators.
Choose a shallow tray, elevate it slightly, and empty it daily.
- Use a plastic saucer
- Place a small brick underneath
- Add a layer of pebbles for drainage
- Empty the tray each morning
Incorporating Native Plants Near the Bath
Because bees love both water and shelter, planting native flowers and shrubs right next to your bath turns the spot into a buzzing oasis.
Choose low‑maintenance species like coneflower, bee balm, or native grasses; they provide pollen, shelter, and a familiar scent.
Arrange them in loose clusters, let sunlight filter through, and watch bees flit between blossoms and droplets, turning your garden into a lively, fragrant playground.
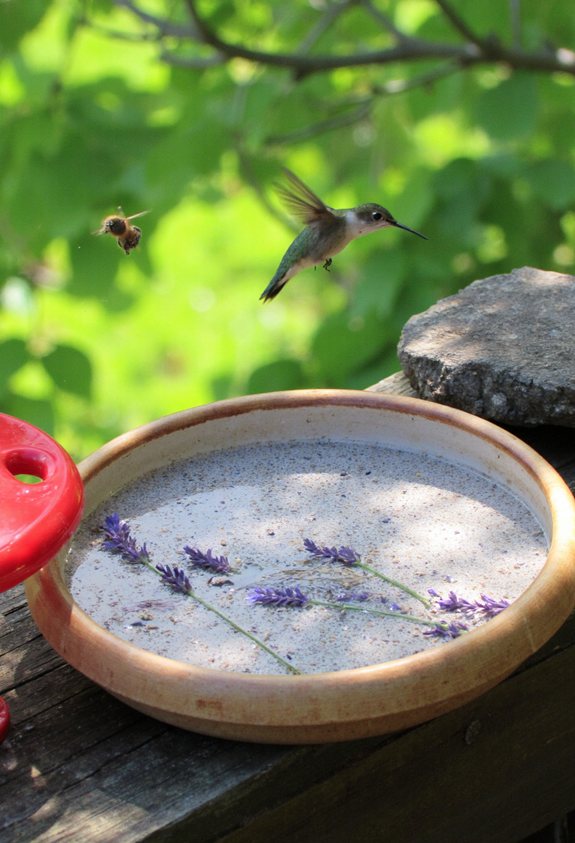
Attracting Solitary Bees With Specific Flowers
Ever wondered why solitary bees seem to pop up around certain flowers and not others? You’ll notice they love bright, open blossoms that give easy access to pollen and nectar.
Pick the right plants and you’ll turn your garden into a buzzing boutique for these tiny pollinators.
- Lavender
- Sunflower
- Bee balm
- Wild thyme
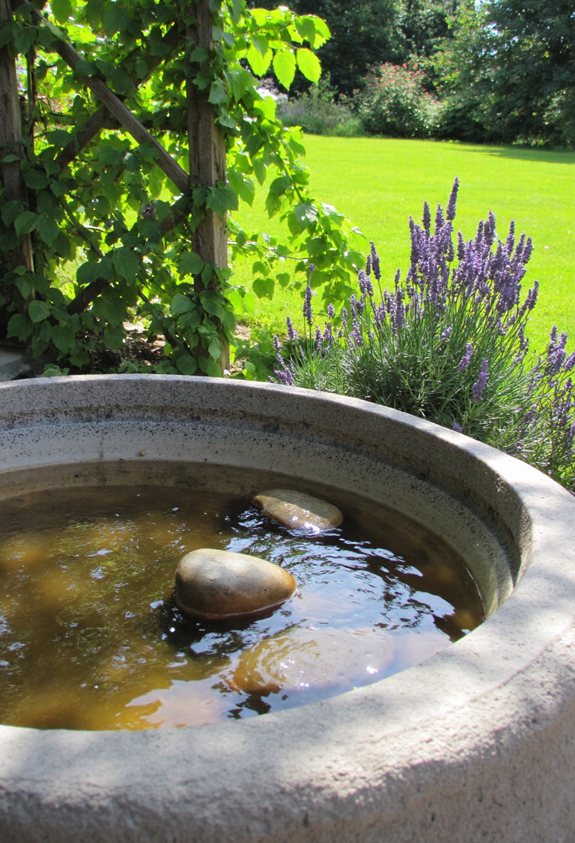
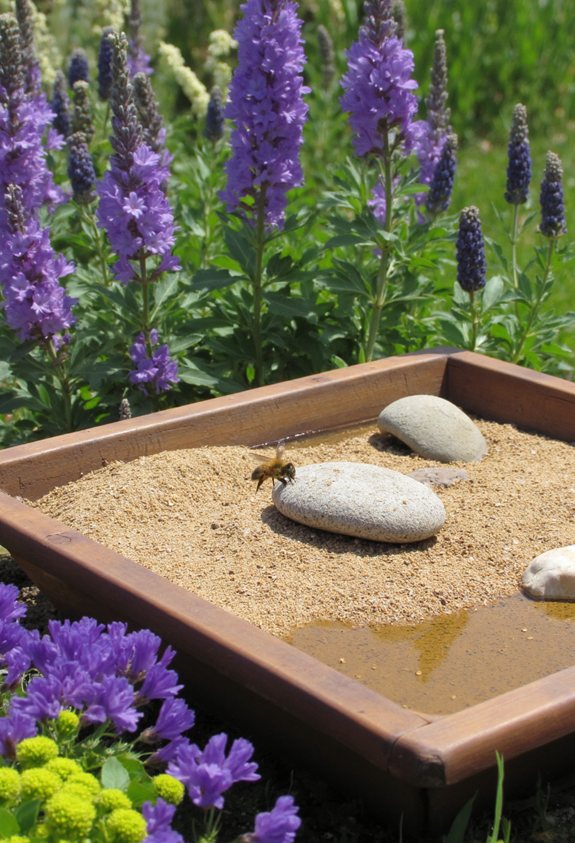
Supporting Bumblebees With Taller Bath Setups
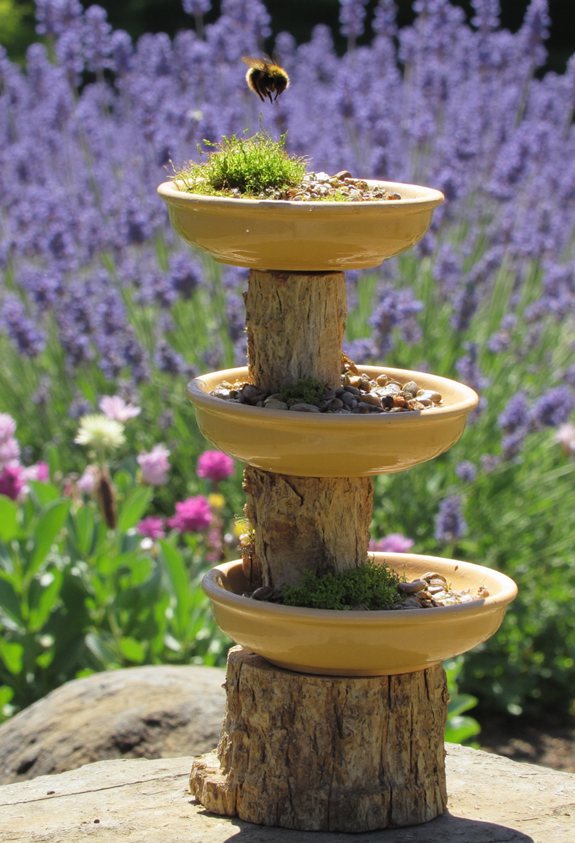
When you raise a bee bath a few feet off the ground, bumblebees feel safer and can sip without worrying about soggy paws.
Use a sturdy pot or bucket on a short stand, then fill it with shallow water and a few pebbles.
The height keeps predators away, while the pebbles give them grip.
Watch them buzz happily, and you’ll see why taller baths matter.
How to Spot Common Bee Bath Problems
If you notice a thin film of green on the water’s surface, that’s a sign algae are taking over, and the bees will avoid the bath like a soggy sock.
You’ll also see floating debris, foul smells, or stagnant water that looks murky.
Check these signs early to keep your bee friends happy.
- Algae bloom covering the surface
- Crusty or moldy edges on the basin
- Strong, sour odor emanating from the water
- Tiny insects or larvae swimming around
Troubleshooting Stagnant Water Issues
Algae and mold are clear signs that the water’s gone stale, but the real trouble starts when the surface stays still for too long.
You’ll notice a film, a sour smell, and sleepy bees hovering awkwardly.
To fix it, stir the water daily, add a small rock or splash, and replace half the liquid every two days.
Fresh, moving water keeps the bath lively and inviting.
Preventing Mosquito Breeding in Your Bee Bath
Ever wonder why a tiny mosquito can turn your bee bath into a buzzing nightmare? You can stop it by keeping water moving and clean.
- Add a small solar pump for gentle circulation.
- Refresh water every two days.
- Sprinkle a pinch of sand or pebbles to break surface tension.
- Use a fine mesh cover when not in use.
Managing Ant Invasions Around the Bath
When ants discover your bee bath, they can turn a peaceful sip into a bustling highway, and you’ll soon feel like the unwitting host of a tiny, over‑eager parade.
Scatter a thin line of cinnamon or coffee grounds around the rim; ants dislike the scent and will veer away.
Keep the water shallow and change it weekly, so ants lose interest and bees stay the stars.
Using Essential Oils Safely for Bee Comfort
Ever wonder how a drop of lavender or peppermint can turn your bee bath into a soothing spa instead of a buzzing nightmare?
You can add just a few drops, but keep it light—bees love subtle scents, not overpowering clouds.
Mix oil with water, stir gently, and watch them relax.
- Use 1‑2 drops per gallon of water
- Choose pure, food‑grade oils
- Avoid citrus, which can deter bees
- Refresh the mixture every few days
DIY Bath Variations for Small Urban Gardens
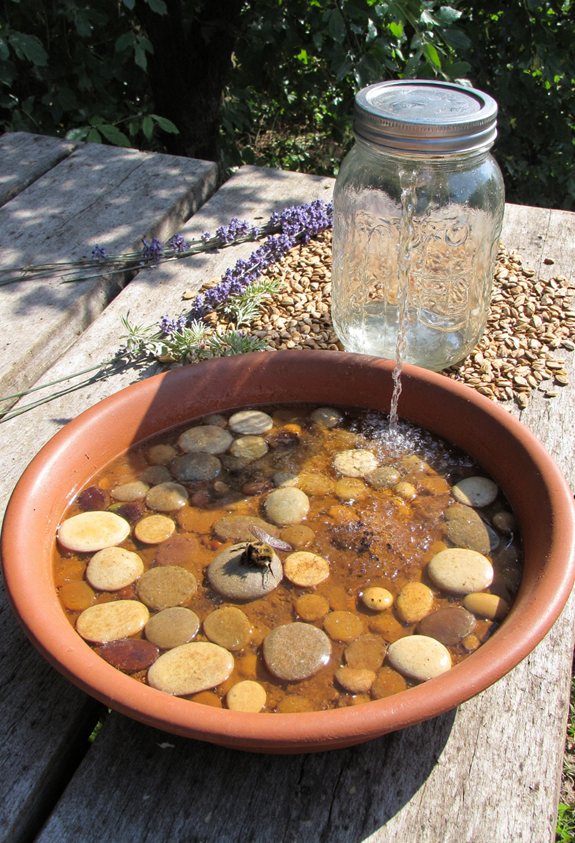
How can you turn a tiny balcony into a buzzing oasis without breaking the bank? Grab a shallow dish, fill it with pebbles and a splash of rainwater, then add a few drops of citrus oil for scent.
Hang a small mason‑jar with a cotton wick, or repurpose an old birdbath saucer on a railing. Keep it sunny, change water weekly, and watch bees zip by.
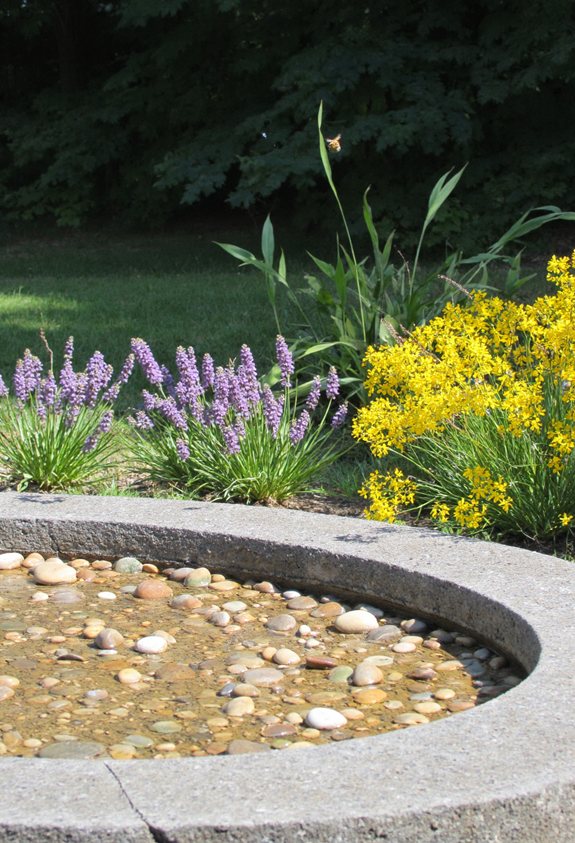
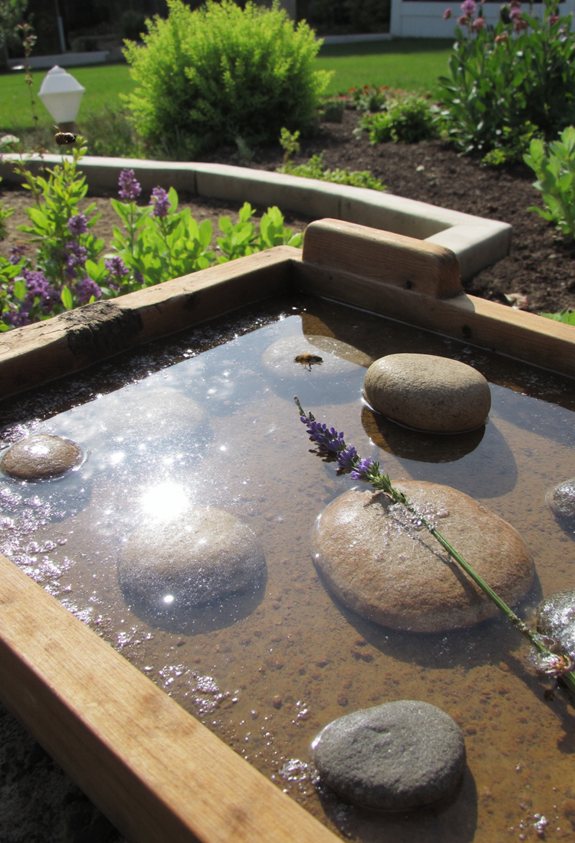
DIY Bath Ideas for Large Rural Landscapes
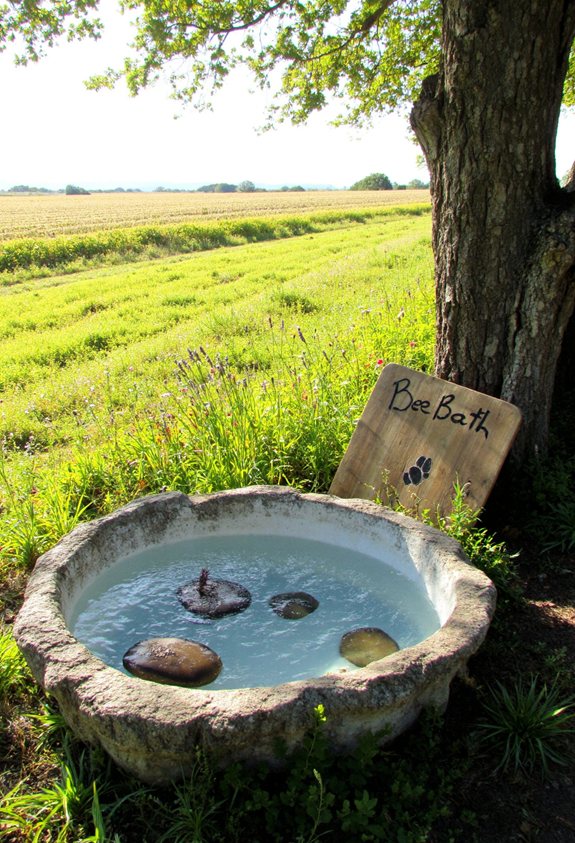
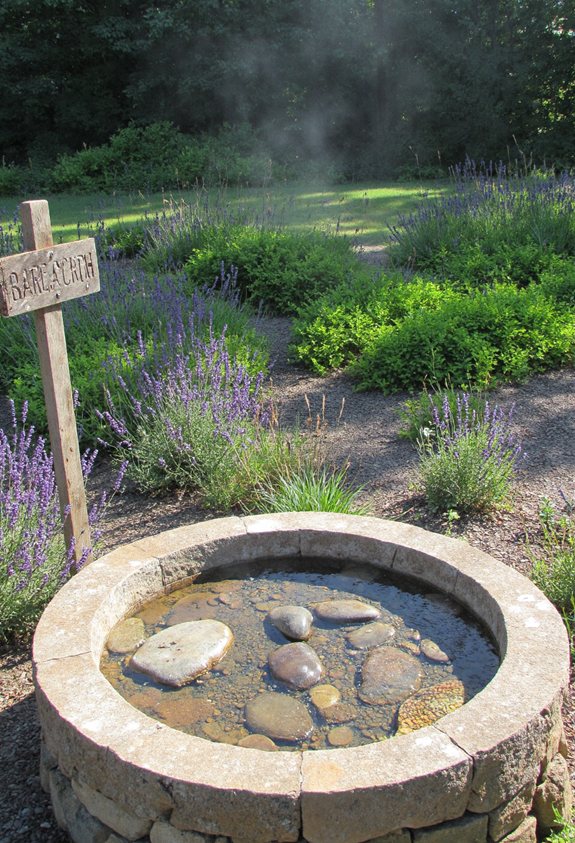
If you’ve got acres of rolling fields or a sprawling farmyard, turning a corner of that space into a bee‑friendly oasis is easier—and cheaper—than you might think. Use wide‑mouthed barrels, shallow troughs, or repurposed rain barrels, and sprinkle in rocks or pebbles for grip.
- Large wooden trough filled with water
- Half‑filled plastic drum with pebbles
- Stone‑lined sand pit with a shallow water tray
- Gravel‑filled concrete basin with a sloping edge
Repurposing Household Items as Bee Baths
When you look around your kitchen, you’ll see dozens of items that can become a buzzing bee oasis with just a little imagination.
A shallow dish, a broken tea‑cup, or a plastic lid filled with pebbles and water works wonders.
Add a few drops of honey or a sprig of mint, and watch bees sip, hover, and dance around your repurposed garden treasure.
Eco‑Friendly Materials for Sustainable Baths
After you’ve turned an old teacup or a kitchen lid into a buzzing bee hotspot, the next step is choosing materials that won’t harm the planet.
Pick natural, non‑toxic options that let water evaporate slowly and stay safe for pollinators.
- Recycled glass shards
- Untreated bamboo sticks
- Sun‑dried coconut husk
- Compost‑grade terra‑cotta pieces
Budget‑Friendly Options Under $10
One simple way to keep your bee bath under $10 is to raid your own kitchen and garden stash.
Toss an old tin, a shallow bowl, or a repurposed plant saucer into the mix.
Fill it with pebbles, sand, and a splash of water.
Add a few fresh herbs for scent.
You’ll attract buzzing visitors without breaking the bank.
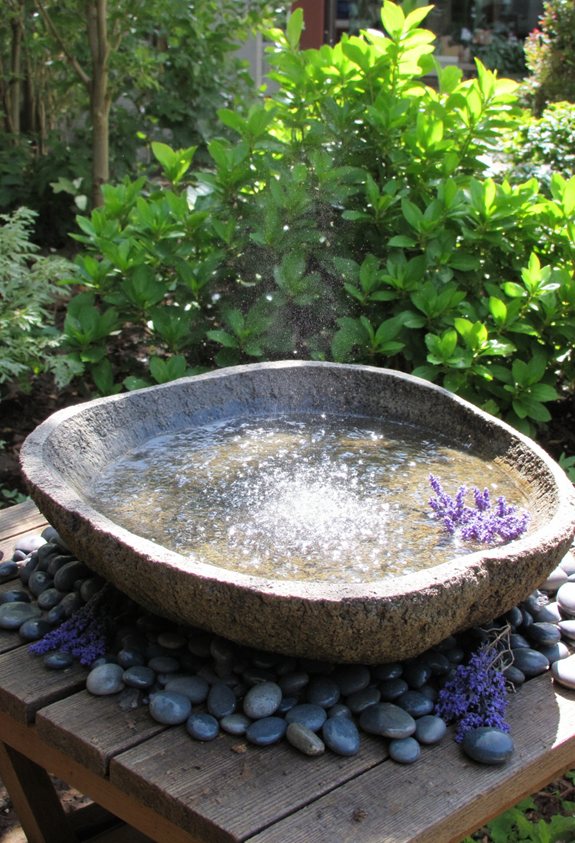
Premium Upgrades for High‑Traffic Pollinator Zones
Ever wondered how a simple bee bath can become a buzzing hotspot in a busy garden? Upgrade for heavy traffic with sleek stone basins, solar‑powered misters, aromatic herb ribbons, and a tiny water‑wheel that creates gentle ripples. These premium touches draw more pollinators, keep water fresh, and turn your garden into a lively, fragrant oasis.
- Stone basin for durability
- Solar misting system for cool spray
- Herb ribbons for scent and nectar
- Mini water‑wheel for movement and fun
How to Measure Bee Visits and Track Success
Your upgraded bee bath is looking great, but now you’ll want to know if the extra stone, mist, and herb ribbons are actually pulling in more visitors.
Count bees each morning for a week, noting species and time spent.
Use a simple tally sheet or phone app, then compare totals before and after upgrades.
Spot trends, celebrate spikes, and adjust placements for even buzzing success.
Using a Simple Log to Record Water Changes
If you want your bee bath to stay fresh and inviting, keeping track of each water change is a must. Grab a notebook, jot the date, note the water level, and write any observations about bee activity. This simple habit shows you care and helps you spot patterns quickly.
- Date of change
- Amount of water added
- Weather conditions
- Bee behavior notes
Integrating a Bee Bath Into a Polinator Garden Plan
When you design a polinator garden, placing a bee bath near the flower beds creates a natural “water stop” that keeps buzzing visitors happy and encourages them to linger longer.
Choose a sunny spot, but not scorching, and surround it with low‑lying plants that guide bees in.
Keep the water shallow, refill regularly, and watch the garden buzz with grateful pollinators.
Combining Bee Baths With Bird Feeders Safely
A bee bath and a bird feeder can share the same garden corner without turning it into a chaotic splash zone, as long as you give each critter its own space and water level. Keep the bird feeder on a raised platform and the bee bath low, use a shallow dish for bees, and add a splash‑guard barrier.
- Place feeder at least two feet from bath
- Use shallow, stone‑filled dish for bees
- Install a small lip or screen to limit splashes
- Provide separate water sources for birds and insects
Engaging Kids in Building and Maintaining the Bath
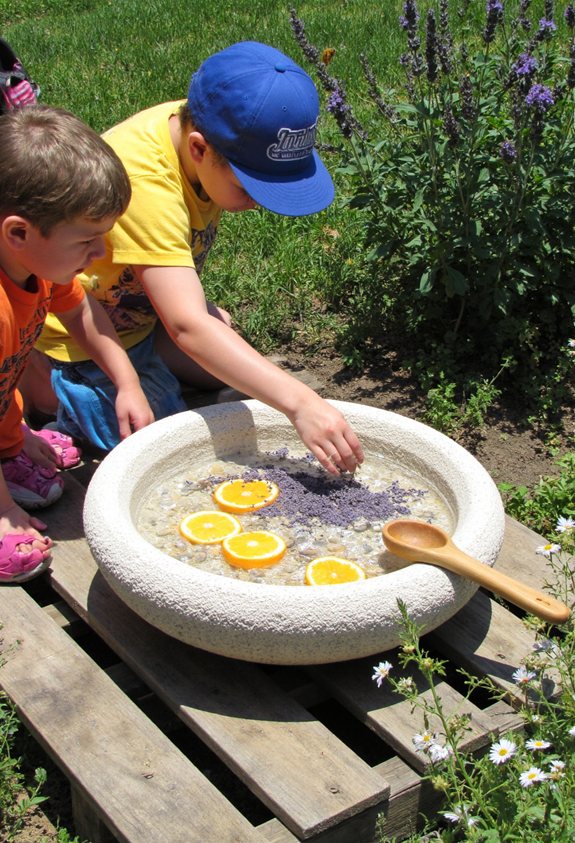
Even a simple garden project can become an adventure when you let kids take the lead, and building a bee bath together is the perfect mix of science, creativity, and a little mess.
Let them scoop pebbles, splash water, and arrange flowers while you chat about buzzing friends.
Assign daily checks—refill water, wipe debris—so they feel responsible, proud, and maybe a bit muddy, too.
Educational Benefits of Observing Bees Up Close
If you watch a bee buzz from flower to flower, you’ll quickly realize it’s a living lesson in science and teamwork. You’ll see pollination in action, learn patterns, and feel curiosity spark.
Watching bees up close turns ordinary garden time into a hands‑on classroom, connecting you with nature’s tiny engineers.
- Observe pollination steps
- Identify bee species
- Track flight paths
- Discuss ecosystem roles
Hosting a Community Bee‑Bath Day Event
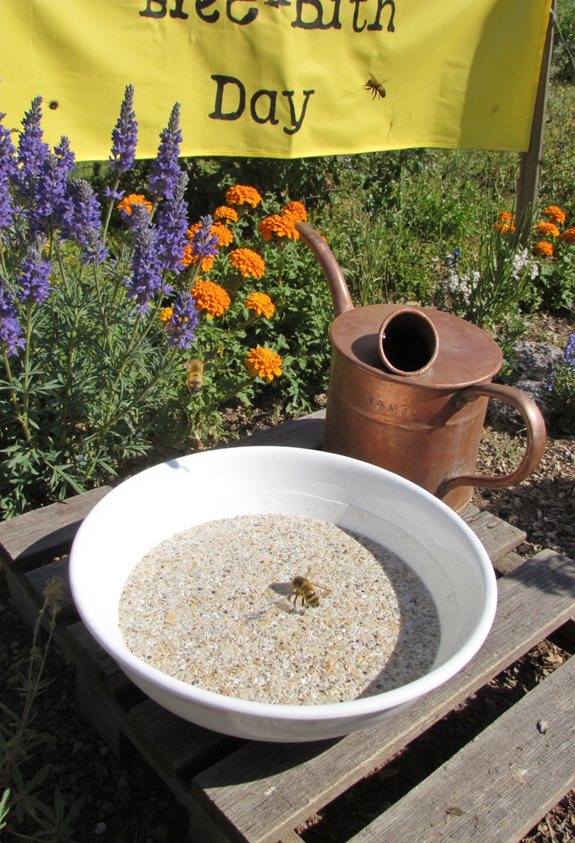
Curious how a simple backyard project can bring neighbors together and help bees thrive? Invite friends, set up the bath in a park, and hand out flyers with bright stickers.
Offer a quick demo, then let kids sprinkle water and watch buzzing visitors.
Share snacks, swap stories about favorite flowers, and celebrate community spirit while the bees feast.
Sharing Your Bee Bath on Social Media for Awareness
When you snap a photo of your DIY bee bath and share it online, you’re not just showing off a cool project—you’re giving bees a megaphone.
Your post can spark curiosity, inspire neighbors, and attract pollinator lovers worldwide.
- Tag local gardening groups and bee‑friendly hashtags.
- Include a short “how‑to” caption with emojis.
- Invite followers to post their own bee bath pictures.
- Use a bright, close‑up shot that highlights buzzing visitors.
Common Myths About Bee Baths Debunked
After sharing your bee‑bath pics, you might notice a flood of comments full of well‑meaning advice—some of it, actually myths.
One myth says bees need sugary water; they prefer plain, shallow puddles.
Another claims you must change the water daily; occasional cleaning suffices.
Some think any container works, yet rough stones prevent drowning.
Finally, you don’t need flowers nearby—just a safe, sunny spot.
Frequently Overlooked Factors That Affect Bath Success

Even if you think you’ve nailed the perfect bee bath, tiny details can make or break its success. You might overlook water depth, stone placement, sunlight exposure, or nearby chemicals—each subtly shifts how bees use it.
- Keep water shallow, just a few centimeters deep.
- Use flat stones for easy landing.
- Position in partial shade, avoiding harsh midday sun.
- Keep pesticides and fertilizers far away.
How Climate Change Impacts Bee Hydration Needs
Because temperatures are climbing faster than ever, bees are drinking more water than they used to.
You’ll notice them buzzing near puddles, panting like tiny hikers in a heatwave.
Hotter days evaporate moisture quickly, so their thirst spikes and they risk dehydration.
Adapting Your Bee Bath for Drought Conditions
When the sky stays stubbornly dry, your bee bath needs a little extra ingenuity to keep the buzzing visitors coming. Use shallow dishes, add a sponge, and place the bath in shade. Refresh water frequently and sprinkle a few drops of sugar water to attract thirsty bees.
- Fill a shallow tray with pebbles for texture.
- Insert a damp sponge to hold moisture longer.
- Position the bath under a leafy tree for natural shade.
- Refill early morning and evening to reduce evaporation.
Future Trends: Smart Sensors for Bee Bath Monitoring
If you’ve ever watched a bee dip into a tiny puddle and thought, “That could use a tech upgrade,” you’re not alone—gardeners are already experimenting with smart sensors to keep their bee baths in tip‑top shape.
Tiny moisture probes send alerts when water drops low, while temperature tags warn of overheating.
You’ll see LED indicators blink, letting you refill at the perfect moment, turning garden chores into a fun, data‑driven ritual.
Quick Recap of Essential Steps to Keep Bees Happy
Even a tiny splash of water can turn your garden into a bee‑friendly oasis, and keeping it that way isn’t rocket science. You’ll love watching them buzz happily when you follow these basics.
- Fill the bath with shallow, clean water and add pebbles.
- Change water every few days to prevent stagnation.
- Place the bath near flowers but out of direct sun.
- Keep the area free of pesticides and strong chemicals.