Pick a sunny spot with 6‑8 hours of light, test the drainage, and mix in sand and compost so water runs through in under 30 seconds. Measure the area, space bulbs 4‑6 inches apart, and add a 10 % buffer—hardy Dutch hybrids and dwarf Parrot tulips give a colorful mix that blooms in May.
Plant each bulb pointy side up, 6‑8 inches deep, mulch, and water early morning. Stake tall stems, protect with rosemary rings, and enjoy the flood of colors before the frost returns, then keep reading for more tips.
Define Your Tulip Garden Goals and Space Limits
When you picture your backyard blooming with tulips, start by figuring out what you really want—whether it’s a splash of color for a family photo, a quiet spot for morning tea, or a kid‑friendly garden that doubles as a learning project.
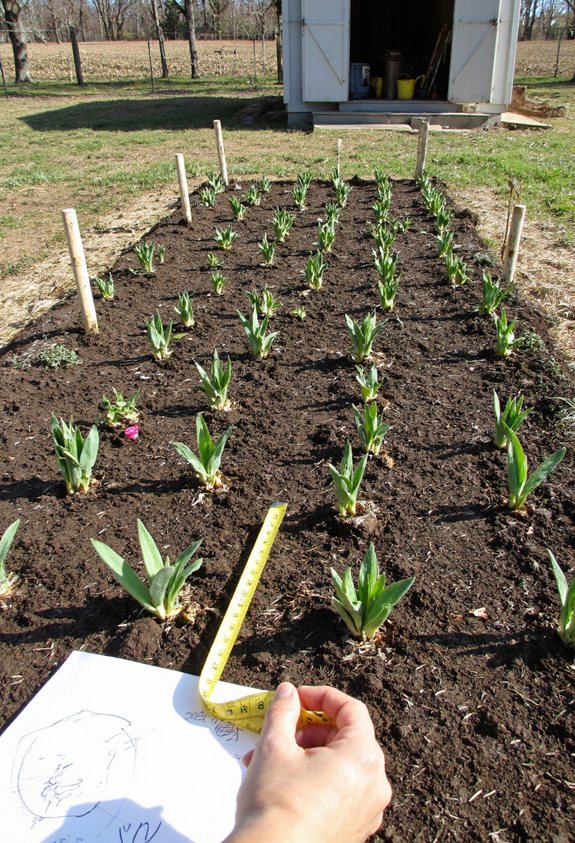
Measure the area, note sunlight patterns, and decide how many beds you can manage.
Set realistic goals, like blooming in May, and keep space for walking paths and compost bins.
This roadmap keeps your garden focused and fun. Additionally, consider incorporating strategic hook placement to hang garden tools and accessories, making your gardening experience more efficient and organized.
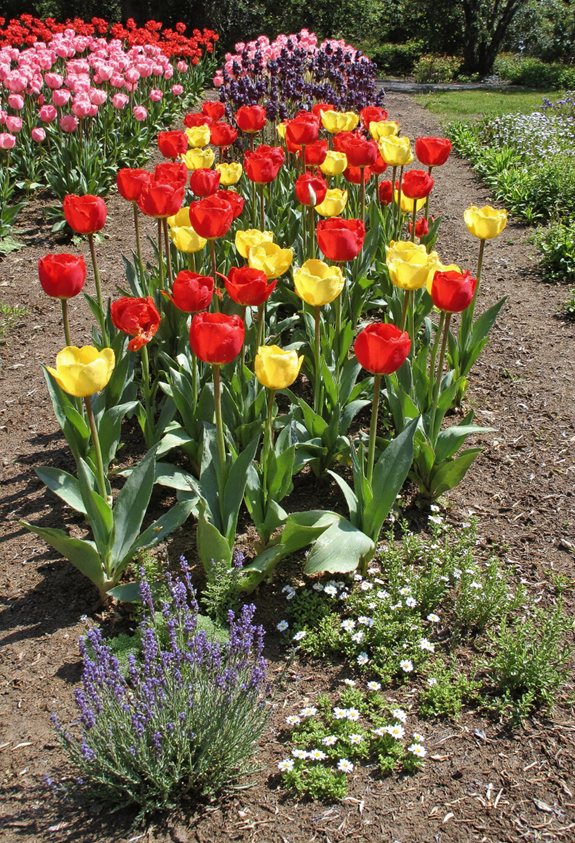
Choose the Best Tulip Varieties for Backyard Planting
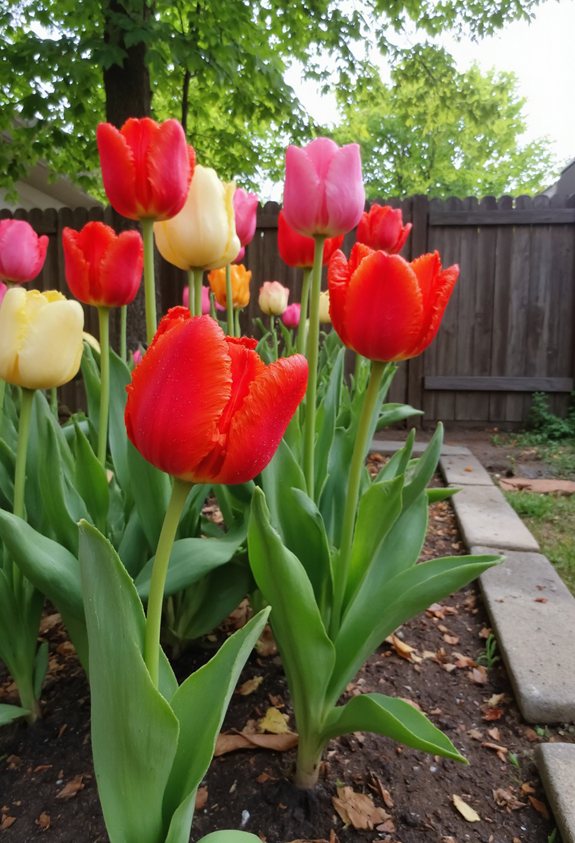
Choose hardy Dutch hybrids for bold colors, early‑blooming Triumphs for quick excitement, and dwarf Parrot tulips for quirky charm. Additionally, consider incorporating a focal point such as an outdoor soaking tub to enhance your garden’s aesthetic appeal and create a serene atmosphere. Mix single‑flower classics with multi‑flower blends, and remember to match colors with your home’s style for a stunning, personal spring display.
Calculate How Many Bulbs You Need for a Full‑Bloom Display
Ever wonder how many tulip bulbs you actually need to turn a modest backyard into a sea of color?
First, measure your planting area, then decide on spacing—usually 4‑6 inches apart.
Divide the square footage by the space each bulb occupies, and add a 10% buffer for gaps or missing plants.
That quick math gives you the perfect bulb count for a stunning, full‑bloom display. Additionally, consider incorporating effective storage solutions for your gardening tools to keep your planting space organized and efficient.
Test Soil Drainage and Amend It for Optimal Growth
If your tulip beds stay soggy after a rain, the bulbs will drown before they even get a chance to sprout.
Dig a shallow hole, fill it with water, and watch how quickly it drains.
If it lingers longer than 30 seconds, mix in sand, compost, or perlite.
Re‑test after amending, then plant your bulbs confidently, knowing the soil won’t hold them hostage. Soil quality is crucial to ensure optimal growth and prevent issues such as waterlogging.
Pick the Ideal Planting Site Based on Sunlight and Airflow

When you scout a spot for your tulip bed, think of it like picking a seat at a sunny picnic—your bulbs need plenty of light but also a gentle breeze to stay healthy.
Choose a location that gets six to eight hours of direct sun each day, and avoid cramped corners where air stagnates.
A slight wind keeps foliage dry, reduces disease, and lets your tulips flourish. Additionally, consider incorporating seasonal elements like flowers and greenery around your tulips to enhance your spring display.
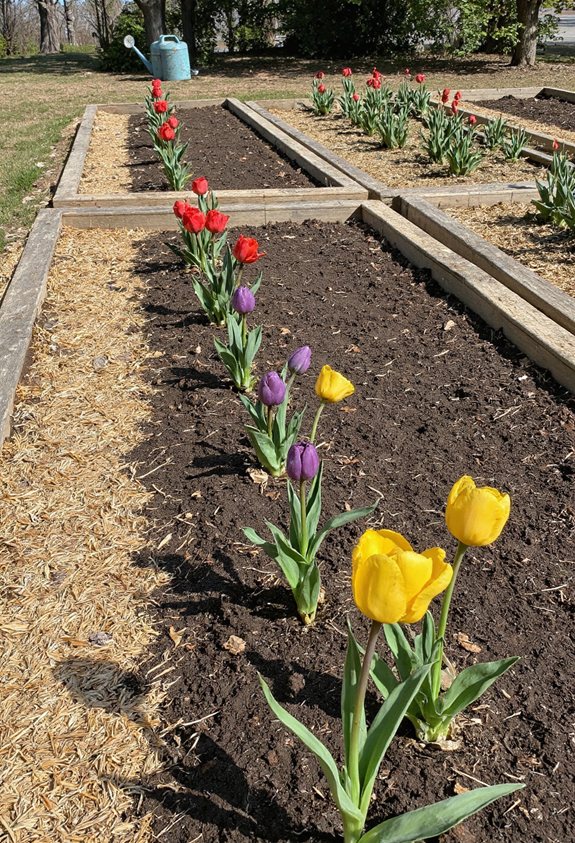
Prepare a Raised Bed or Container Bed for Better Drainage
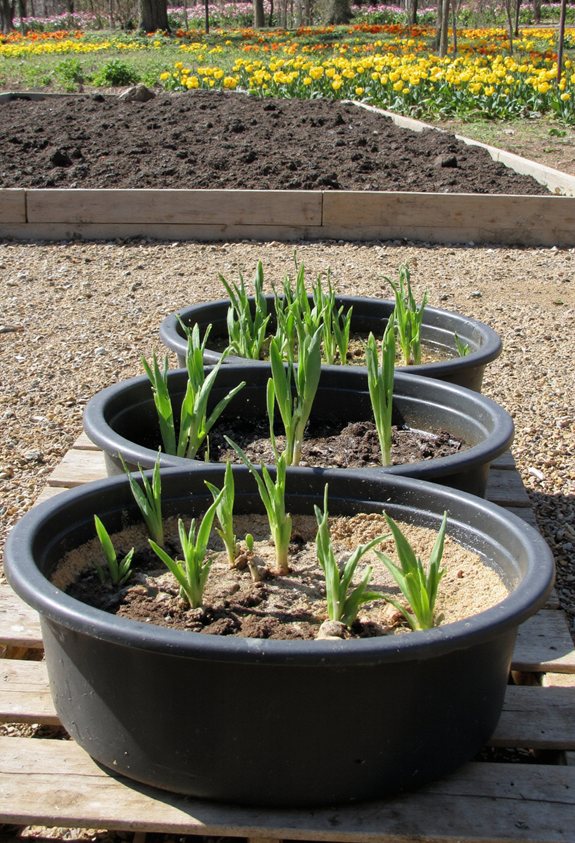
Finding the perfect sunny spot is just the first step—now you need a place where water can flow freely, or those tulip bulbs will turn soggy and sad.
Build a raised bed or container with coarse soil, a sturdy frame, and good airflow.
- Choose a wooden or stone frame.
- Add a layer of gravel for drainage.
- Fill with a mix of compost and sand.
- Top with a light, fluffy soil.
Utilizing a proper drainage system is crucial for keeping your tulip bulbs healthy and vibrant.
Set Up a Simple Irrigation System for Consistent Moisture
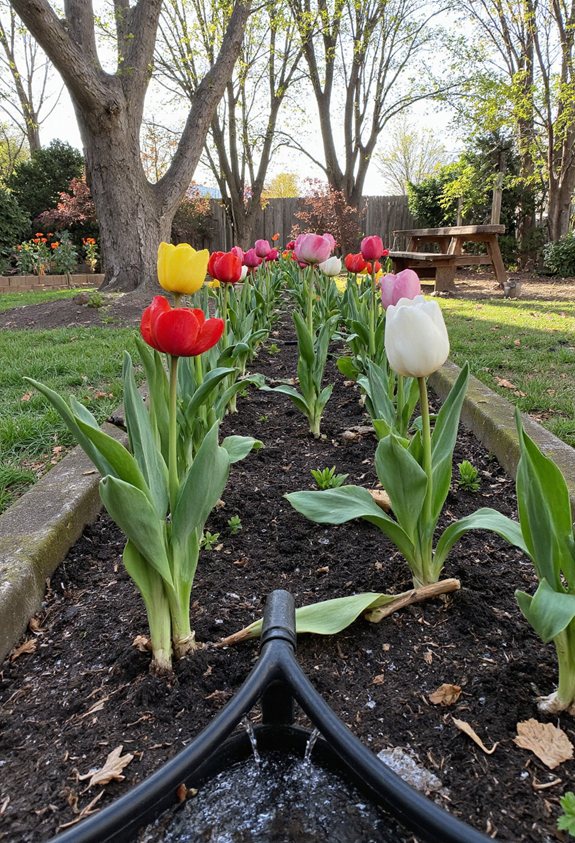
Even a basic drip line can keep your tulips happy, so you won’t have to stare at wilted leaves while the sun beats down.
Connect a timer‑controlled hose to a low‑pressure emitter, run it along the bed’s edge, and clip small drippers near each plant.
Check flow weekly, adjust for rain, and enjoy steady moisture without endless watering trips. Additionally, consider space-maximizing strategies to efficiently organize your gardening tools and supplies near your tulip farm.
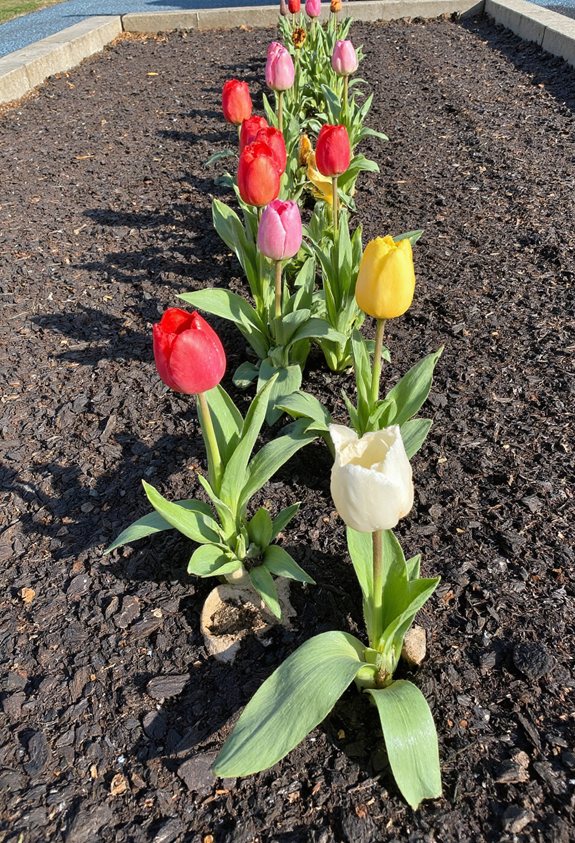
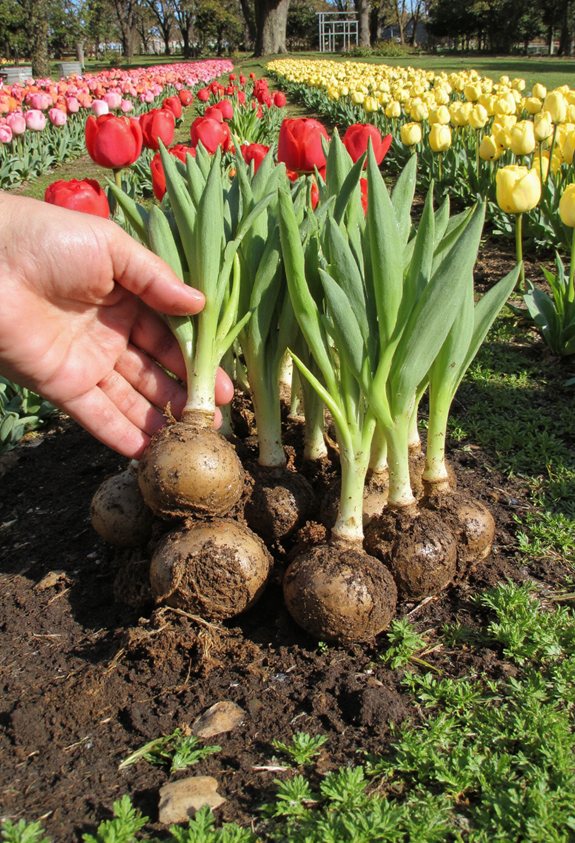
Plant Tulip Bulbs at the Correct Depth and Spacing
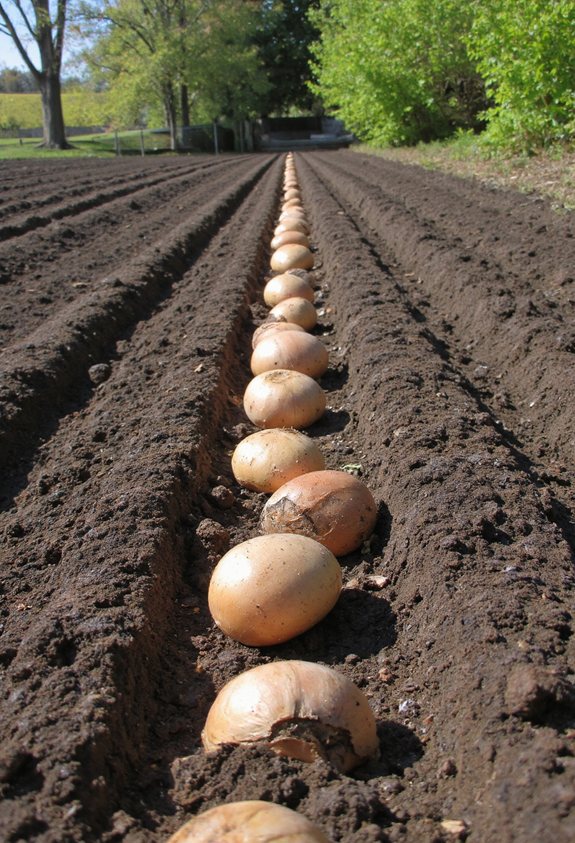
If you want your tulips to burst through the soil like fireworks, planting the bulbs at the right depth and spacing is key.
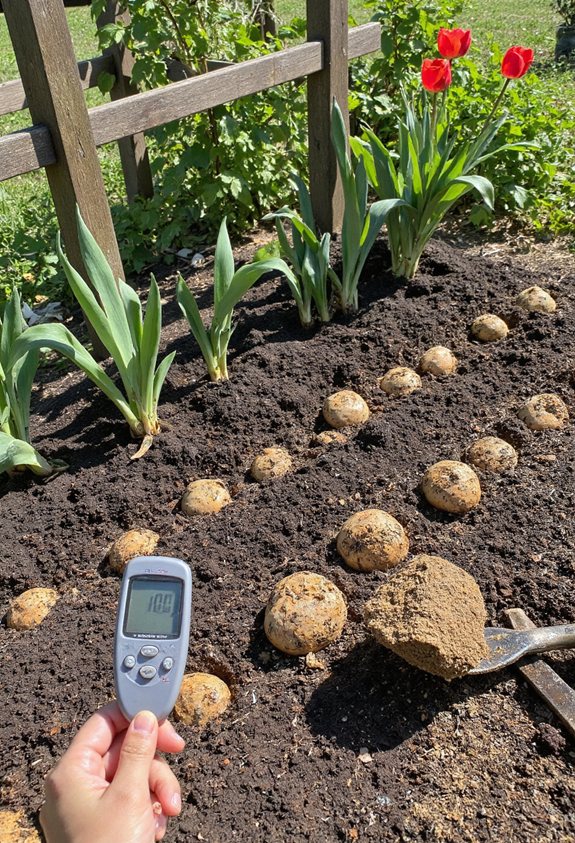
Dig a hole two to three times the bulb’s height, place each bulb pointy side up, and cover it with loose soil.
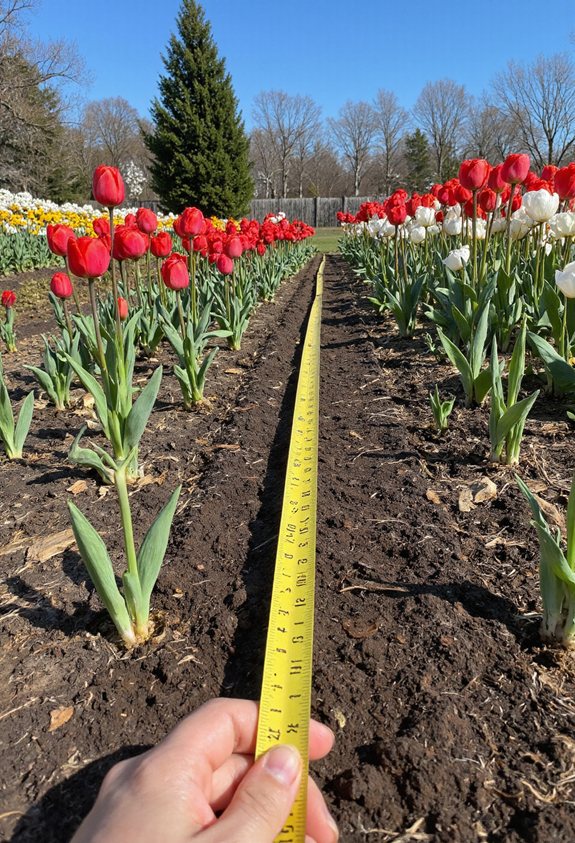
Keep them about four inches apart so they’ve room to grow without crowding.
- Depth: 6‑8 inches
- Spacing: 4 inches apart
- Pointy side up
- Loosened soil cover
Consider incorporating visual interest to enhance the overall appeal of your tulip display.
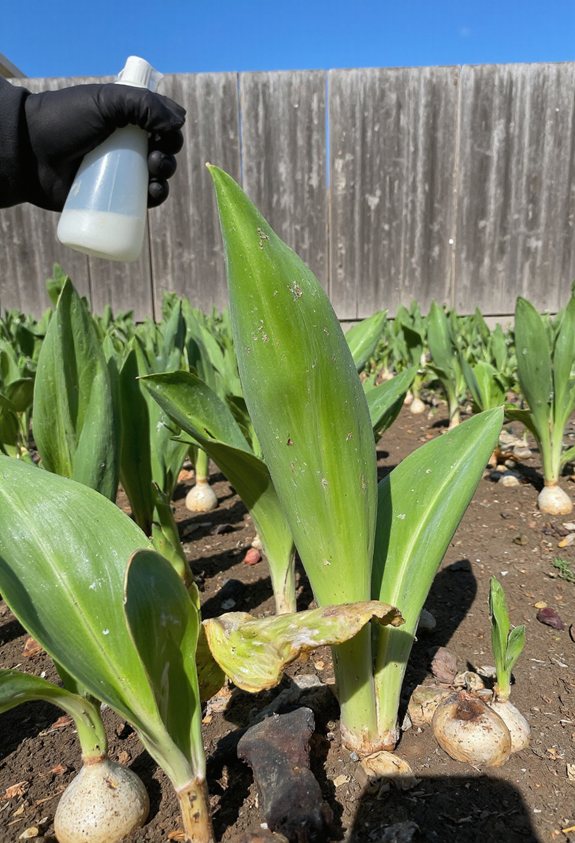
Apply a Balanced Fertilizer to Encourage Strong Roots
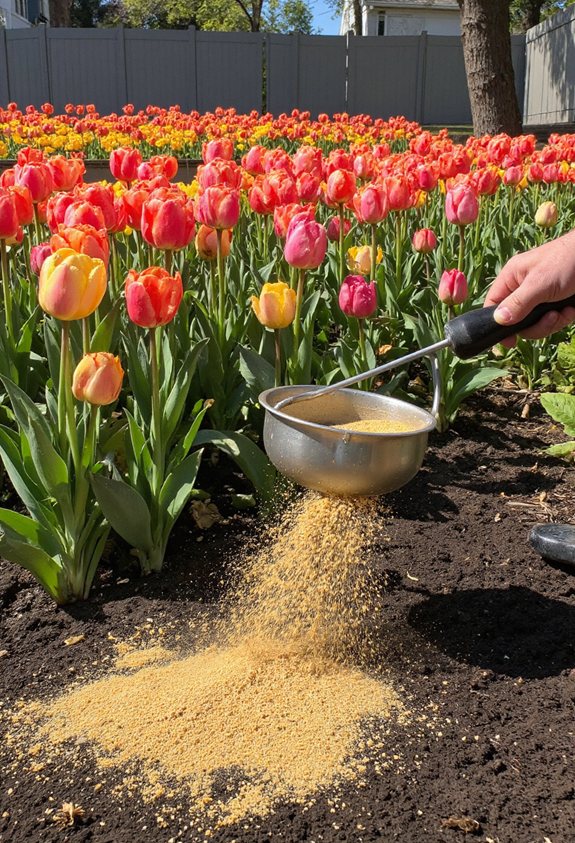
When you’re ready to give your tulips a boost, a balanced fertilizer works like a power‑up for their roots.
Sprinkle a slow‑release mix—10‑10‑10 or 5‑10‑5—around each plant, then water gently.
The nutrients feed the developing root system, making stems sturdier and blooms brighter.
Think of it as feeding your garden a nutritious snack, not a full‑blown feast. Additionally, employing a technique like proper spacing can further enhance overall growth and flowering potential.
Mulch the Bed to Retain Moisture and Suppress Weeds
Since the soil dries out fast in summer, spreading a layer of mulch over your tulip bed works like a cozy blanket that locks in moisture and keeps pesky weeds at bay.
Choose organic bark, shredded leaves, straw, or pine needles for best results.
You’ll notice healthier bulbs, fewer weeds, and a garden that feels snug and protected.
- Use 2‑3 inches of bark mulch.
- Add a thin straw layer for extra insulation.
- Sprinkle shredded leaves to boost nutrients.
- Top with pine needles for a fresh scent. Layered lighting throughout the room can also enhance the ambiance of an outdoor space, creating a cozy atmosphere during evening hours.
Protect Young Bulbs From Pests and Deer With Natural Barriers
After you’ve tucked the mulch in like a warm blanket, the next step is to keep hungry critters from nibbling your fresh tulip bulbs.
Plant a ring of rosemary or lavender around each cluster; their scent deters deer and rabbits.
Sprinkle crushed eggshells or coffee grounds for extra protection.
If a fence is needed, use low, woven mesh and tie it securely, ensuring no gaps for sneaky paws.
Monitor Temperature and Protect Against Late Frosts
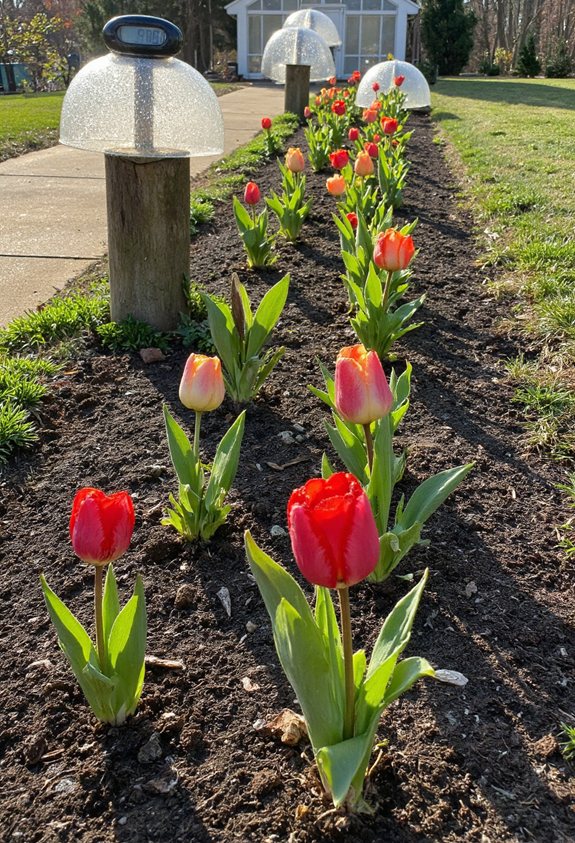
Even if the sky looks clear, a sudden dip in temperature can still sneak up on your tulip buds, so keeping an eye on the forecast is essential.
Check nightly lows, use a thermometer, and be ready to cover plants when frost threatens.
- Install a simple frost cloth cover.
- Set a timer for heating lamps.
- Place a windbreak to retain warmth.
- Keep a weather app with alerts.
Water Properly During the Growing Season Without Over‑Saturating
A good watering routine is the secret sauce that keeps tulip buds happy and prevents soggy roots.
Water early morning, letting soil dry slightly between sessions.
Use a gentle spray, not a torrent, and aim for about an inch per week.
Check moisture with your finger; if it feels damp, hold off.
Mulch helps retain just enough moisture without drowning the bulbs.
Identify and Treat Common Tulip Diseases Early
Keeping your tulips healthy starts with spotting problems early, because a tiny spot of disease can quickly turn a thriving garden into a soggy mess.
Check leaves for yellow patches, wilting, or fuzzy growth.
Act fast with proper airflow, drainage, and organic sprays.
- Spot yellowing leaves
- Remove infected stems
- Apply copper fungicide
- Boost soil with compost
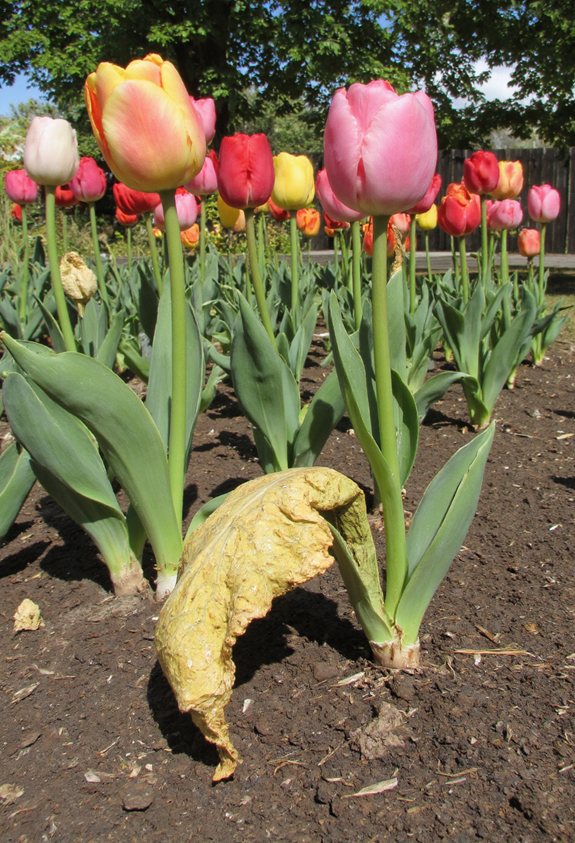
Prune or Remove Damaged Leaves to Keep Plants Healthy
Ever noticed a wilted leaf hanging like a sad flag on your tulip stems? Snap it off before it spreads disease.
Use clean scissors, cut at the base, and discard the leaf in compost.
Healthy foliage lets sunlight reach the buds, boosting color and growth.
Think of it as giving your tulips a fresh haircut—quick, painless, and totally worth it.
Support Tall Varieties With Staking or Plant Cages
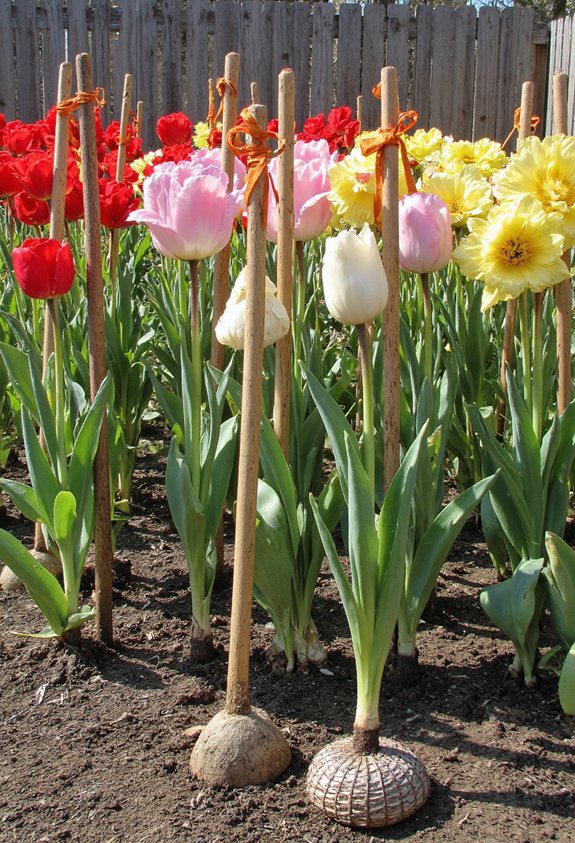
If your tulip stems start reaching for the sky, a simple stake or cage can keep them from toppling over like a wobbly tower of blocks.
Choose sturdy bamboo, wrap twine gently, and tuck the cage around the base; you’ll see upright blossoms dancing in the breeze.
- Insert bamboo stakes 2‑inches deep.
- Tie soft twine loosely to each stake.
- Slip a metal or plastic cage over the plants.
- Adjust height as buds swell.
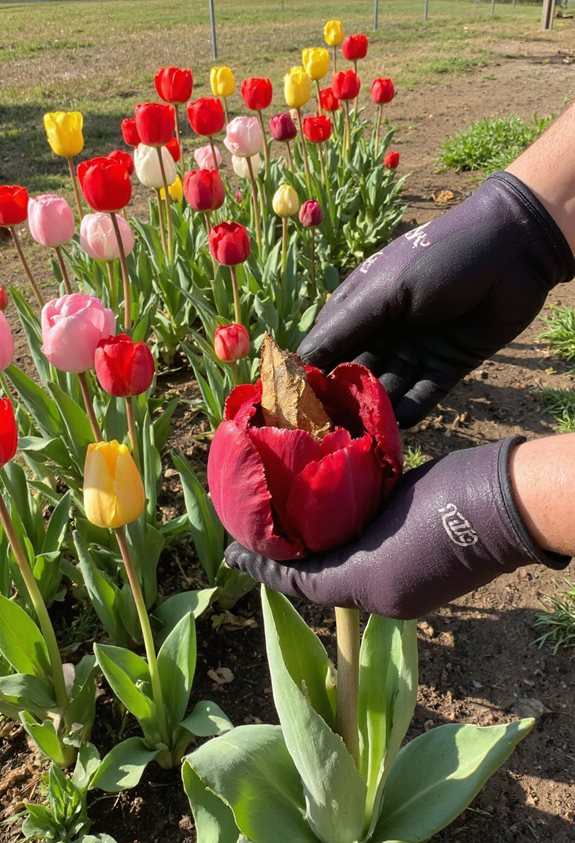
Harvest Tulips at Peak Freshness for Cut Flowers

The thrill of watching a tulip’s bud swell into a perfect bloom is hard to beat, especially when you know the exact moment to snip it for a gorgeous vase.
Harvest early in the morning when petals are crisp; use clean, sharp scissors at cut just above the leaf line.
Place stems in cool water, keep them out of direct sun, and enjoy fresh, vibrant bouquets all day.
Store Bulbs After Bloom for Next Year’s Planting
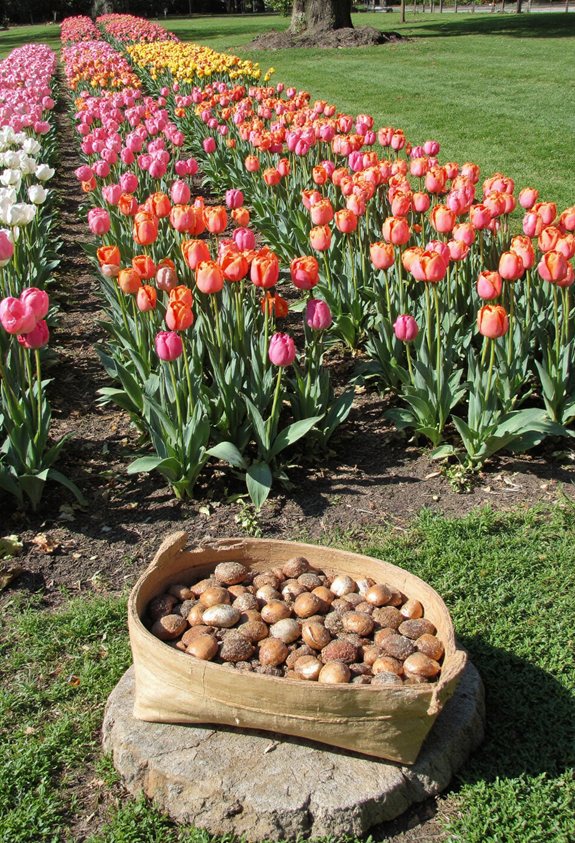
Once the tulips finish their show, you’ll want to give those bulbs a proper send‑off so they can come back stronger next spring. Clean them gently, dry them in a cool, dark spot, then store in breathable bags. Keep temperature steady, avoid moisture, and label each variety for easy recall.
- Trim foliage after colors fade
- Dig up bulbs carefully
- Dry in a ventilated area
- Pack in paper bags, label, and refrigerate 40‑45 °F
Re‑plant or Divide Bulbs to Refresh the Garden Annually
When spring rolls around again, you’ll want to give your tulip beds a fresh start by re‑planting or dividing the bulbs you saved.
Gently loosen the soil, pull up clumps, and separate any crowded bulbs.
Trim off soft, damaged pieces, then plant each healthy bulb about four inches deep, spacing them evenly.
This revives vigor, guarantees full blooms, and keeps your garden lively year after year.
Rotate Planting Areas to Prevent Soil‑Borne Problems
If you keep planting tulips in the same spot year after year, the soil can turn into a hostile neighborhood for your bulbs—full of pests, diseases, and nutrient depletion.
Rotating your planting areas gives each patch a break, restores balance, and keeps your garden thriving.
- Move bulbs to a fresh bed every 2‑3 years.
- Mix in compost to replenish nutrients.
- Alternate with non‑bulb crops to disrupt pest cycles.
- Mark sections to track rotation schedule.
Add Companion Plants That Enhance Tulip Color and Health
Even though tulips love the spotlight, they thrive even more when they’ve friendly neighbors.
Plant low‑growing alyssum or thyme beneath them; their tiny flowers bounce light onto the tulip stems, brightening hues.
Add dwarf lavender for fragrance and pest‑repelling oils, and sprinkle marigolds to deter beetles.
These companions boost color, health, and garden‑party vibes.
Use Seasonal Mulches to Insulate Bulbs Over Winter
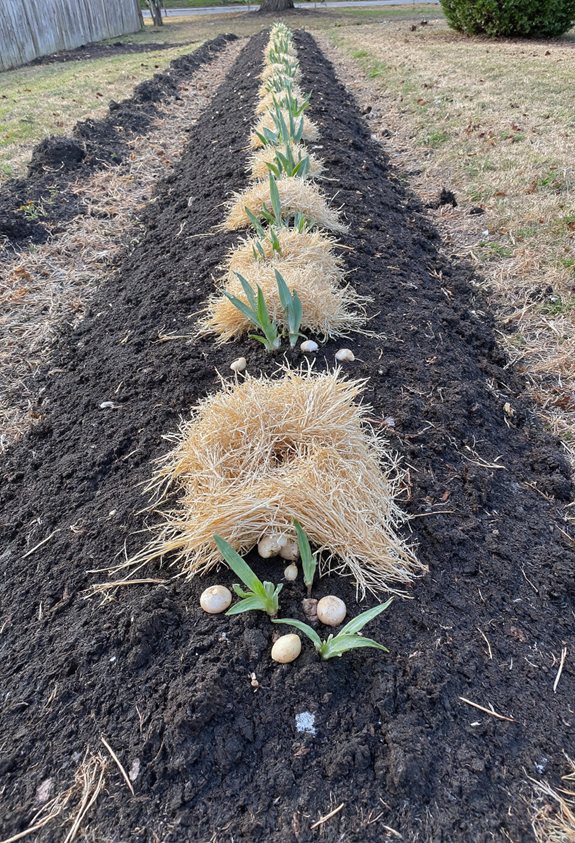
Since the frost is creeping in, you’ll want to wrap your tulip bulbs in a cozy blanket of mulch so they stay warm and safe until spring.
Choose a mulch that insulates well, keeps moisture steady, and breaks down into soil food later.
A good layer also deters weeds and critters, letting your bulbs rest peacefully.
- Straw or hay – light, easy to spread.
- Pine needles – acidic, great for drainage.
- Shredded bark – holds heat, looks tidy.
- Compost – adds nutrients as it decomposes.
Create a Simple Calendar to Track Planting, Care, and Harvest Dates
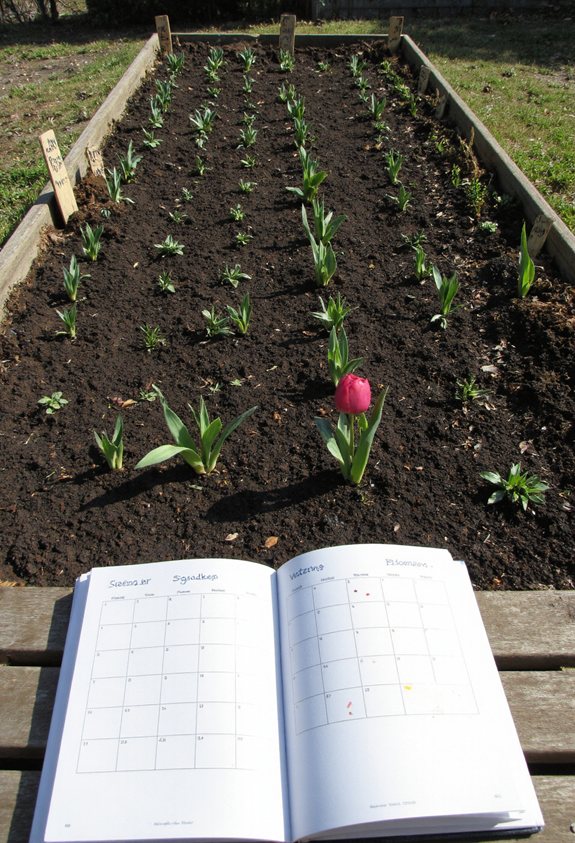
After you’ve tucked the bulbs under a cozy mulch blanket, the next step is to keep track of when you plant, water, and eventually harvest.
Grab a notebook or spreadsheet, list each variety, note planting dates, set reminders for weekly watering, and mark expected bloom and cut‑flower dates.
Color‑code rows for easy scanning, and add smiley stickers when everything thrives.
Troubleshoot Yellowing Leaves and Stunted Growth Issues
When your tulip leaves turn yellow and the plants stay tiny, it usually means something’s off with the soil, water, or light—kind of like a student who’s missed breakfast and now can’t focus in class.
Check these four areas to get your garden back on track:
- Soil pH and nutrients
- Watering frequency and drainage
- Sunlight exposure
- Root health and crowding
Choose Eco‑Friendly Pest Controls for a Sustainable Garden
A handful of simple, eco‑friendly tricks can keep pests out of your tulip garden without harming the planet.
Sprinkle neem oil early, and it repels aphids while smelling like a garden spa.
Plant marigolds nearby; their scent confuses beetles.
Use sticky traps on stakes, and check them daily.
Encourage ladybugs by leaving a few wildflowers.
These steps protect blooms and keep your garden smiling.
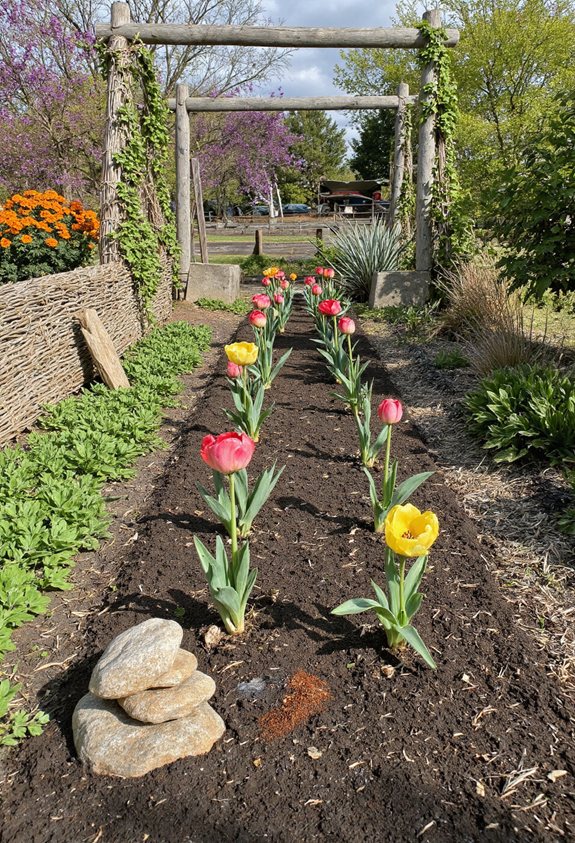
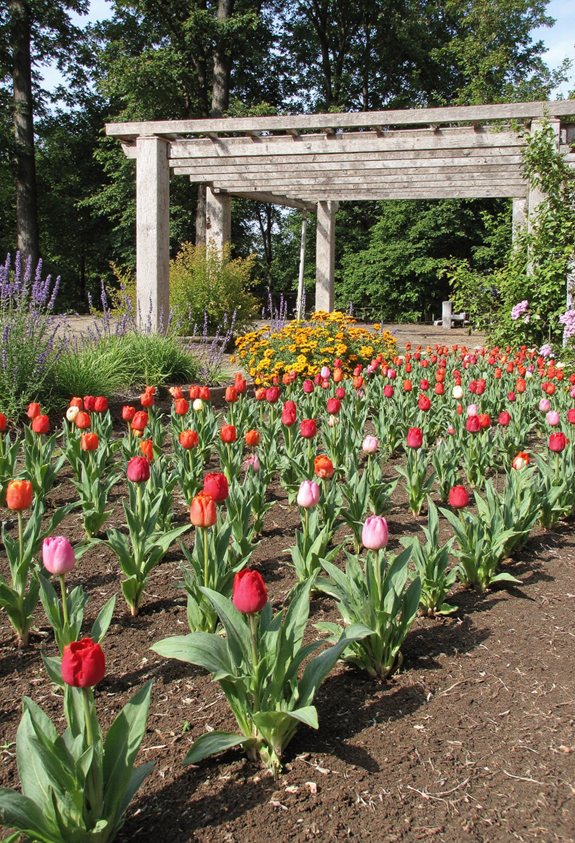
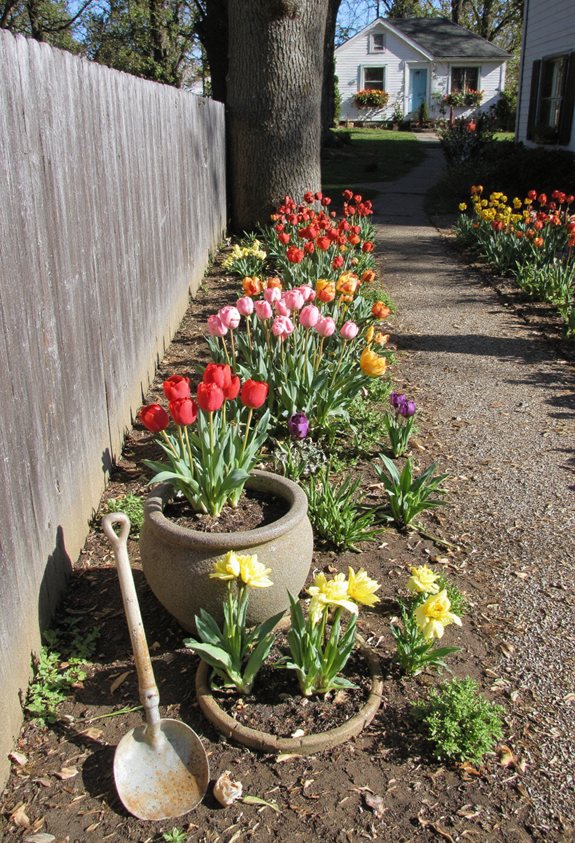
Incorporate Decorative Elements Like Pathways and Garden Borders
You’ve already got the pests under control, so now let’s give your tulip garden a look that makes people want to linger.
Add a winding stone path, plant low‑lying lavender borders, line the edge with reclaimed wood, and sprinkle decorative mulch for texture.
- Curved pebble walkway
- Lavender border rows
- Reclaimed wood edging
- Colorful mulch strips
Light up Your Tulip Bed With Solar Garden Lights for Evening Appeal
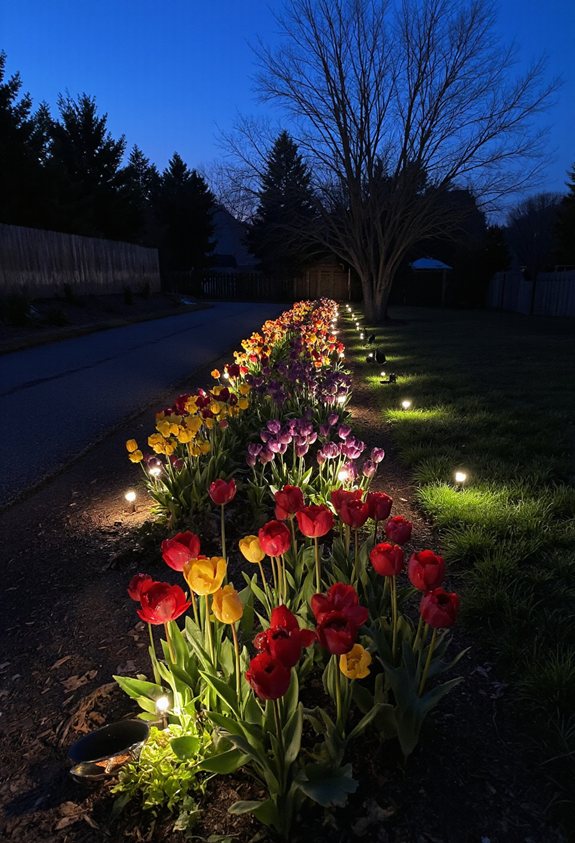
Evening falls, and the tulip bed suddenly feels like a secret garden waiting to glow.
You’ll place solar stakes along the edges, letting their gentle amber lights bounce off petals.
Choose flickering bulbs for a cozy vibe, and set them to turn on automatically at dusk.
A few tiny lights under the leaves create a magical path, making your backyard feel like a fairytale after sunset.
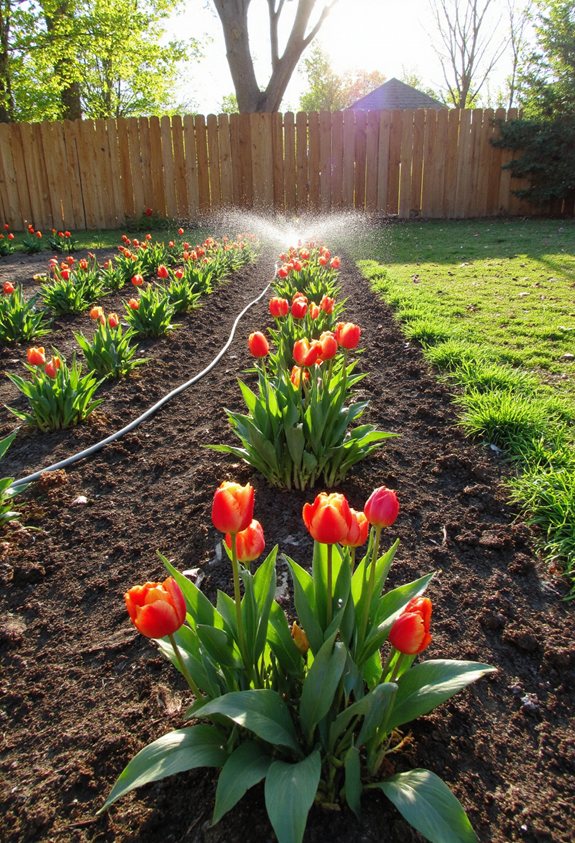
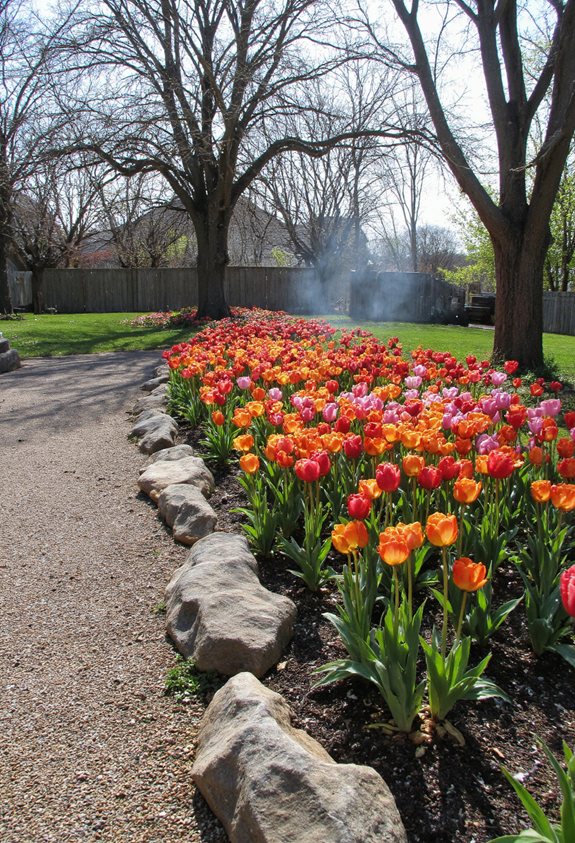
Capture Stunning Photos: Tips for Showcasing Your Spring Display
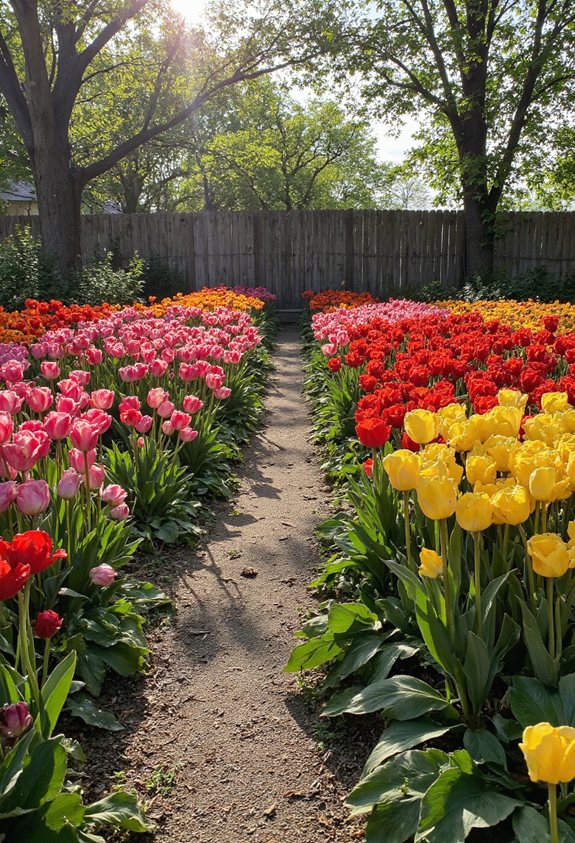
When the sun’s soft glow kisses the tulip rows, you’ve got the perfect backdrop for a photo that feels like a spring postcard.
Use a low angle to make colors pop, shoot early for golden light, and include a simple fence for depth.
Keep the background tidy, and experiment with a shallow focus for dreamy blur.
- Shoot at sunrise or sunset
- Get low to the ground
- Include a fence or garden path
- Use a shallow depth of field
Share Your Tulip Garden on Social Media to Inspire Neighbors
If you post a bright snap of your tulip rows on Instagram or TikTok, neighbors will instantly feel the spring vibe and might even start planting their own.
Tag the location, use a fun hashtag like #BackyardTulips, and add a quick caption about how the colors popped.
Encourage comments, reply with tips, and watch the neighborhood bloom together.
Plan a Backyard Tulip Festival or Open‑House Event
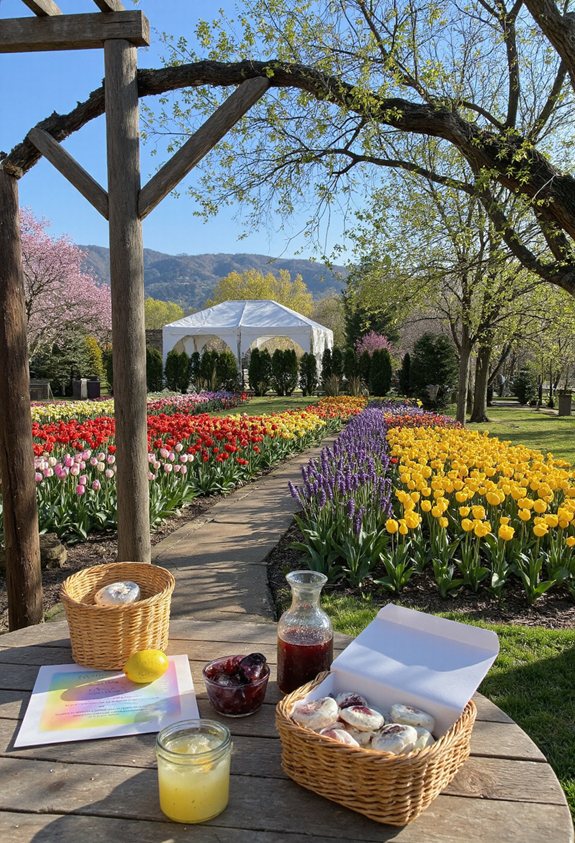
Ever thought about turning your backyard into a mini‑celebration of spring? Invite neighbors, set up a simple sign, serve fresh lemonade, and let tulips be the star.
Your garden becomes a lively stage where everyone snaps photos and shares smiles.
- Choose a date and time that works for most families.
- Create a colorful welcome banner.
- Arrange seating and a tea‑and‑snack table.
- Plan a short guided walk highlighting tulip varieties.
Evaluate Success and Set Goals for Next Year’s Bloom Spectacle

After the garden party wraps up, you’ll want to look back and see what worked and what didn’t, because that’s the only way to make next year’s tulip spectacle even brighter.
Jot down visitor counts, favorite colors, and any wilted stems. Compare your budget to actual costs. Set clear goals: more varieties, better lighting, or a rain‑proof canopy. Celebrate wins, then plan improvements for an even dazzling bloom.